
Basic Guide for API Integration
Updated last week
The Metricool API connects your own tools and scripts to Metricool so you can export data and create, schedule, and manage posts from outside the app. This guide takes you from getting access to your first API call.
Before you start
The API is available on Advanced and Custom plans. Free and Starter plans do not include API access.
Go to Account Settings > API.
Copy your API access token.
Open the official API documentation from the ℹ️ info icon next to the token field, or directly at https://app.metricool.com/resources/apidocs/index.html. A downloadable PDF guide is also available: API English PDF.
Authenticate every call
All endpoints require authentication with three values: your token in the X-Mc-Auth header, plus userId and blogId as request parameters. Requests with a body also use Content-Type: application/json.
X-Mc-Auth: YOUR_API_TOKEN
Content-Type: application/json
userId identifies your Metricool account and blogId identifies the brand. You can read both from the browser URL when you open a brand in the app:
https://app.metricool.com/evolution/web?blogId=00000&userId=0000000To list every brand you manage or that is shared with you, call https://app.metricool.com/api/admin/simpleProfiles?userId=YOUR_USER_ID. Each entry includes its blogId. For a dedicated walkthrough of the account ID, see How to find your Metricool user ID.
Create and schedule a post
Send a POST request to the scheduler endpoint with the publication date, the post text, and at least one network:
POST https://app.metricool.com/api/v2/scheduler/posts?blogId={blogId}&userId={userId}The request body requires:
publicationDate: the date must be in the future, in ISO 8601 format with a timezone, for example
Europe/Madrid.text: the content of the post.
providers: at least one network, for example
{ "network": "facebook" }.
Example request body:
{
  "publicationDate": {
    "dateTime": "2025-07-23T10:00:00",
    "timezone": "Europe/Madrid"
  },
  "text": "Hello! This is a scheduled post test.",
  "providers": [
    { "network": "facebook" }
  ]
}
Optional settings include draft (set to true to save the post as a draft instead of scheduling it), autoPublish, firstCommentText, and network-specific blocks such as facebookData, instagramData, twitterData, linkedinData, pinterestData, youtubeData, tiktokData, gmbData, threadsData, and blueskyData for per-network options like the Facebook post type or Instagram auto-publish. The full parameter reference is in the .yaml and .json Swagger files linked from the API documentation.
What you can do with scheduled posts
The scheduler endpoints support these actions. All paths are relative to the base URL https://app.metricool.com/api.
Action | Method and path |
|---|---|
Create a scheduled post |
|
List scheduled posts between two dates |
|
Get a scheduled post by ID |
|
Update a scheduled post |
|
Edit and update selected fields |
|
Delete a scheduled post |
|
Send multiple posts of a brand to review in bulk |
|
Approve or reject a scheduled post |
|
Get the brand configuration for sending a post to review |
|
Get the Instagram post properties of a brand |
|
Add media to a scheduled post
Media links must be public and must not expire: private or temporary URLs are skipped, and the post is scheduled without media. To attach media, prepare it before you call the scheduler endpoint:
Normalize the media URL with a GET request so the file is hosted on Metricool servers when needed:
https://app.metricool.com/api/actions/normalize/image/url?url=<URL_OF_YOUR_MEDIA>Reference the media in your post through its
mediaId:"media": { "mediaId": "ID_OF_MEDIA" }
Without the media identifier in the request, the post is scheduled without media. See the full worked example in Common questions and errors when using the API.
Publishing limitations
Each social network restricts what third-party tools can publish through its own API, so not every planner feature is available through the Metricool API. For the per-network list of unsupported publishing, inbox, and reporting actions, see API Limitations per Social Network.
The network-specific fields in the request body also vary by network. Check the .yaml and .json Swagger files in the API documentation for the fields available to each network before you build the request.
API Implementation
To export data from Metricool using our API to other platforms such as Excel, Google Sheets, MySQL, and others, follow these general steps:
Obtain the access token from Account Settings > API, as described above.
Set up the HTTP client: use an integration tool like Postman or a programming language (for example, Python with requests) and configure the
X-Mc-Authheader with your token.Send a GET request to the endpoint for the data you want (posts, metrics, reports). All calls require
userIdandblogId. Use the browser inspector to view the calls Metricool makes and their parameters, as shown in How to get an endpoint in Metricool to make API calls.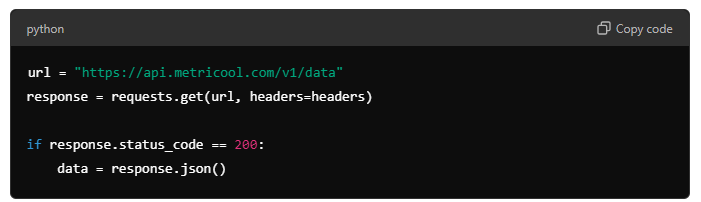
Format the data: responses usually come in JSON, so map the fields to the structure your target platform expects.
Export the data to the target platform.
Each target platform has its own integration method, but the general flow follows this scheme.
Documentation
Here are links to the documentation for APIs of the most commonly used platforms for data management:
Monitor usage and rotate your token
Account Settings > API shows your current API usage and the history of endpoints used. You can also pull usage statistics through the API with GET /v2/settings/users/{userId}/api-usage-stats, which takes from, to, and aggregation parameters and returns the calls made per endpoint.
If you need to replace your token, you can regenerate it from Account Settings > API. Regenerating immediately invalidates the previous token, and every integration using it stops working until you update it. See Regenerate your API connection token.
Related articles