WLA: Standing from your Client’s Point of View
🏷️ Be your own client
🖼️ We are dedicating this entire article to explaining how your client will experience the White Label agency workflows.
🖥️ 📈 🔗
Client Onboarding Process
👩💻 This is how the client experiences the onboarding process. The first step is the email invitation.
Go to Menu > Whitelabel settings > Clients > + Add new client > Type or paste the email > Assign Brands > Enable the brand(s) your client will manage and assign a Role > Continue > Choose between sending the default email or a custom one > Add Client.
Your client will immediately receive an email like the one below. We have highlighted in green the different parts that can be customized.

You can change the sender's name, email address, and logo, as well as both Metricool logos. The text box below ‘Activate your account’ will display the custom message you edited.
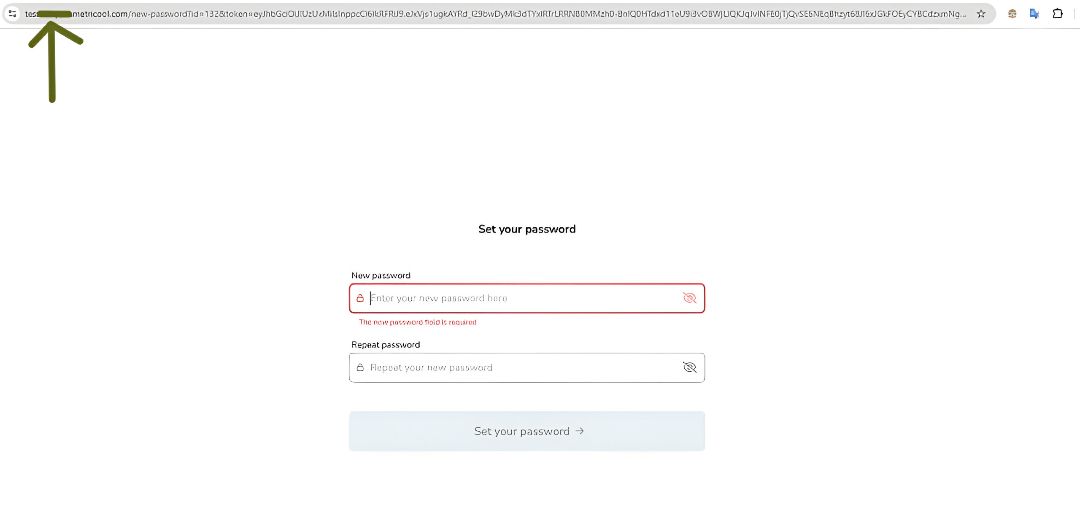
After clicking the activate account button, a password is set. This is where the logo from the Main Settings will be displayed (see details here). We have pointed out the link in green, as this will be your custom domain.
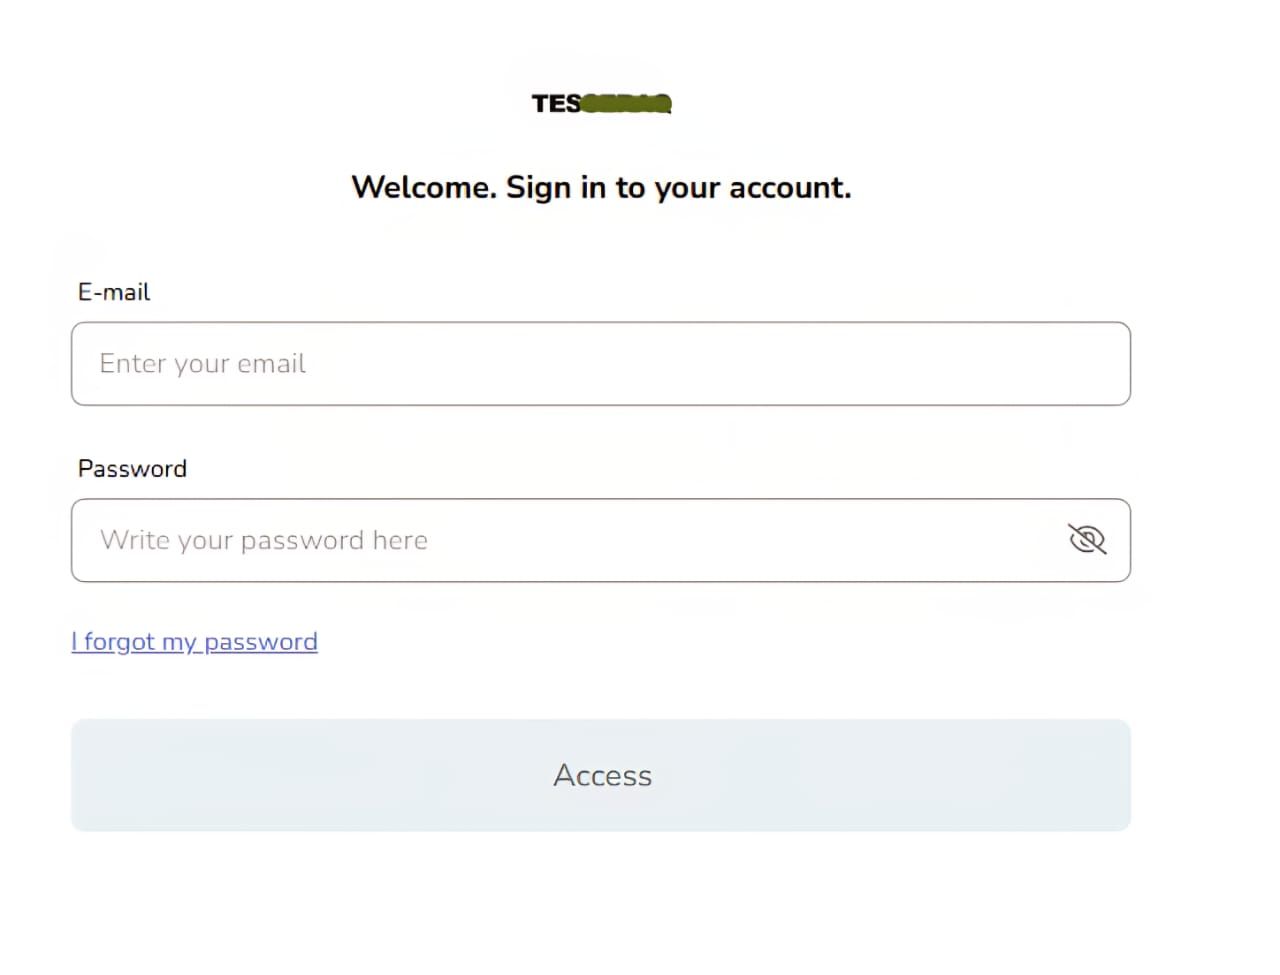
Immediately after, the login window will appear. The word crossed out in green represents the login logo configured in the general settings window.
Now, the Metricool dashboard is shown under the view you configured, which we discussed in previous articles (you can find them at this link; they appear in reading order).
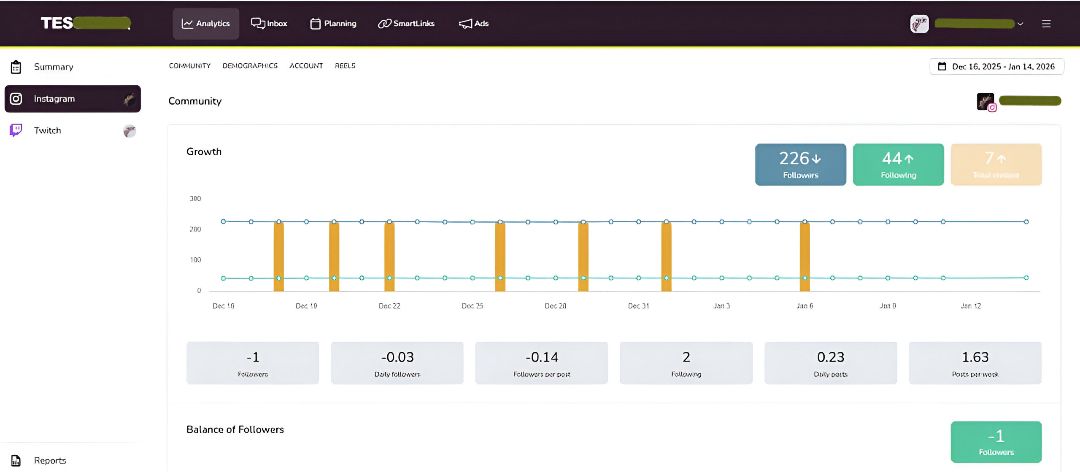
This view also includes your brand colors. Below is a general example of how this customization looks. In this example, we used only blue tones, but it can vary (the background color cannot be changed; it is black in this figure only to differentiate the two types of views).
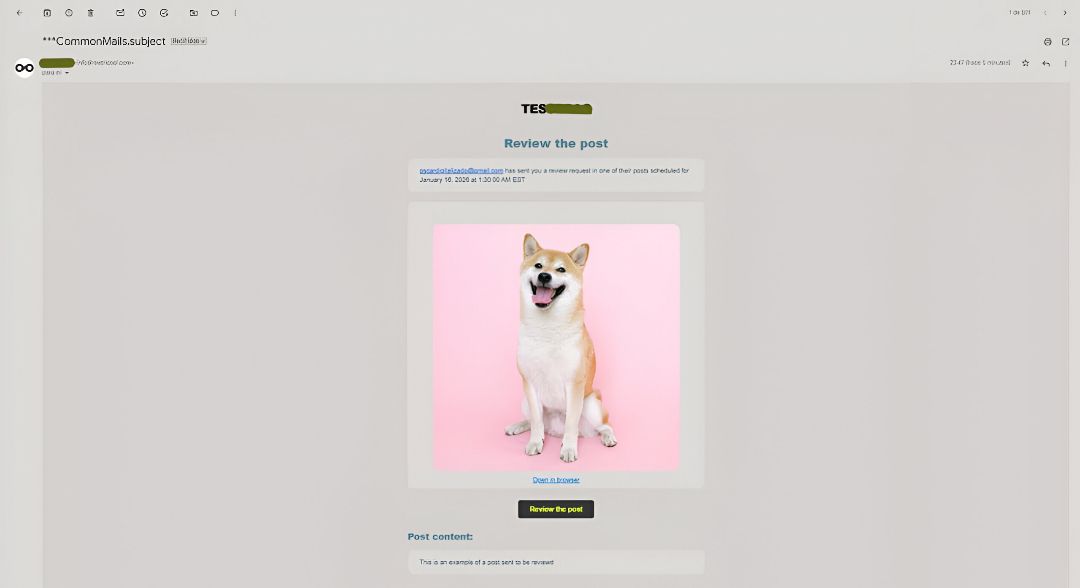
Post Sent to Review - Sent by Email
👩💻 If you are an agency offering content scheduling services, you may need to use the 'Send to review' feature in the calendar. Send the post to any email address to receive approval. Your client does not need an active Metricool account for this.
Open the Calendar > + Create new post > create your edit > click the down arrow next to the Schedule button > Send to review. Your client will receive an email like this:
After clicking the ‘Review post’ button, this window will appear.
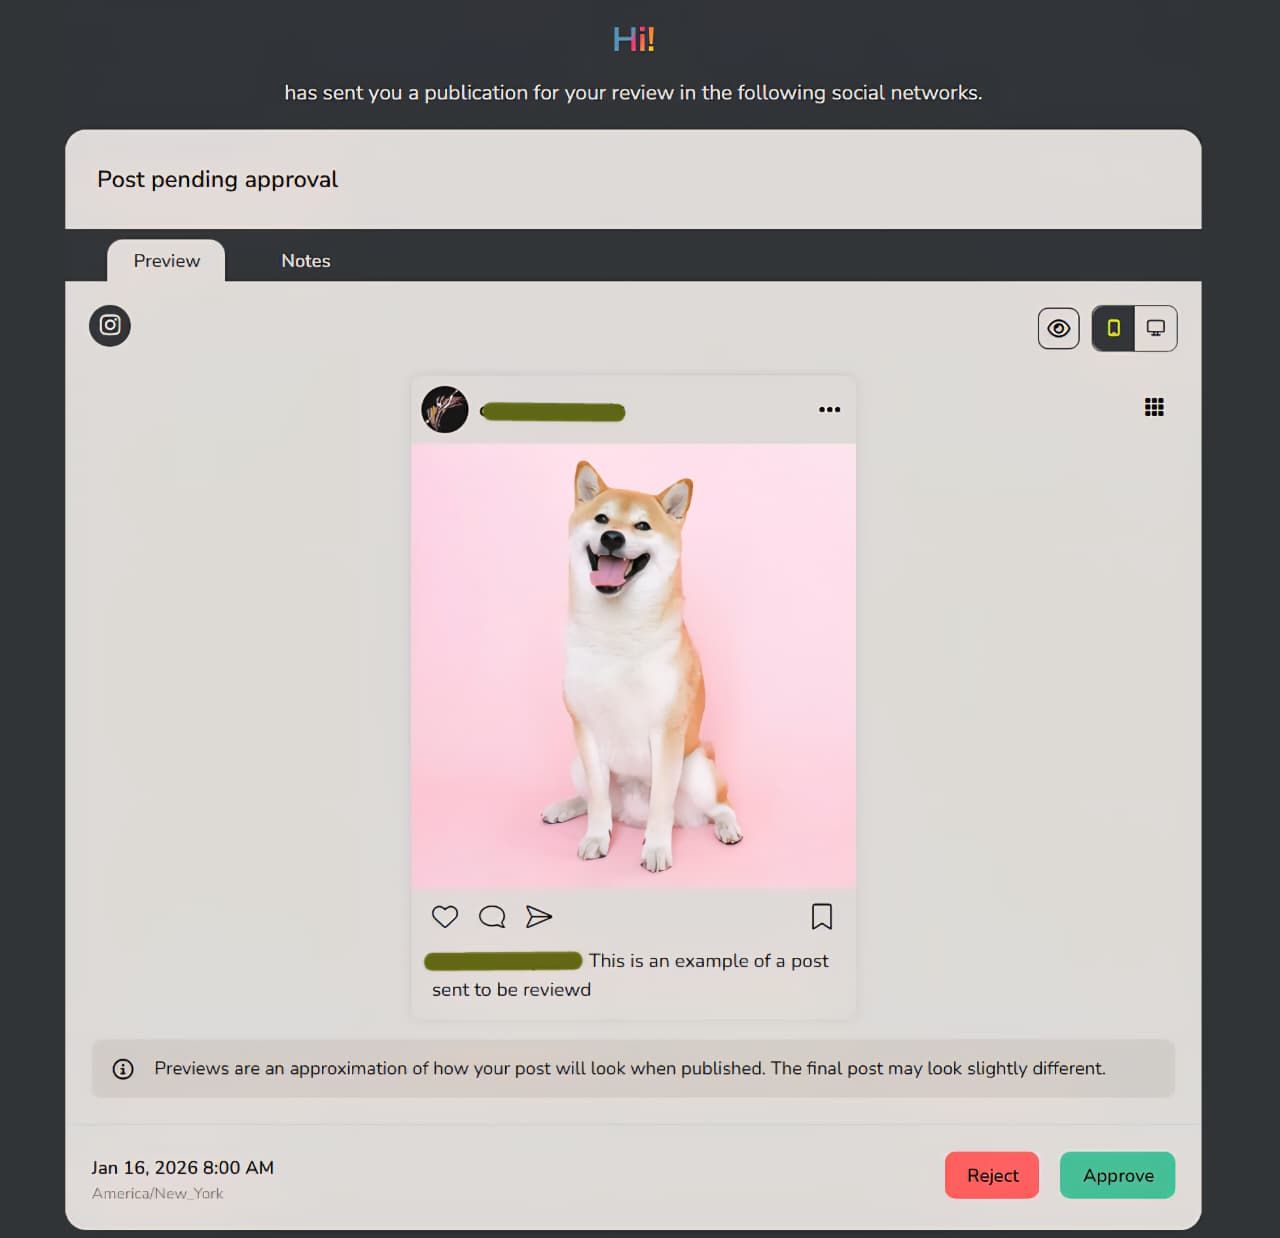
Once the post is approved or rejected, the status will change in your calendar; however, you will not receive notifications at this stage.
ℹ️ If the post was rejected, the user can add a note with comments regarding corrections or other details. This comment will be visible within the notes section of the scheduled post in the calendar, and you can reply with an additional note, creating an internal communication channel with your client.
⚠️ Keep in mind that Clients and Teammates added in your White Label settings will not appear in the user list when sending a post for review from the Calendar.
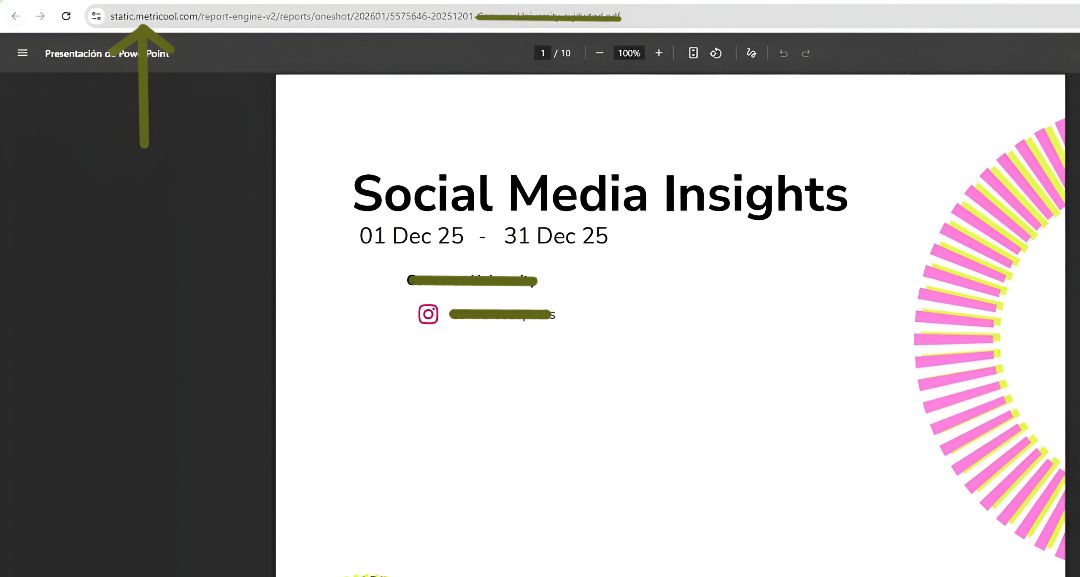
Reports
👩💻 If you grant your client access to the Reports section, they will see the same information you have in your main Metricool account. Please note that if your clients print their own report, the Metricool URL will appear when the report is opened in the browser and is not customizable.
You can learn all about generating reports and the available custom templates from your main account in the last references of this fifth article. Although you cannot give your clients access to Looker Studio directly, you can use it yourself, sharing access from Looker for your team to manage as well (it is included in your package) to offer personalized reporting alternatives to your clients.
Interface View
👩💻 Whether you have given access to a client or a teammate (with full or partial permissions), this will be the menu they see. As you can see, no payment or account information appears in them.
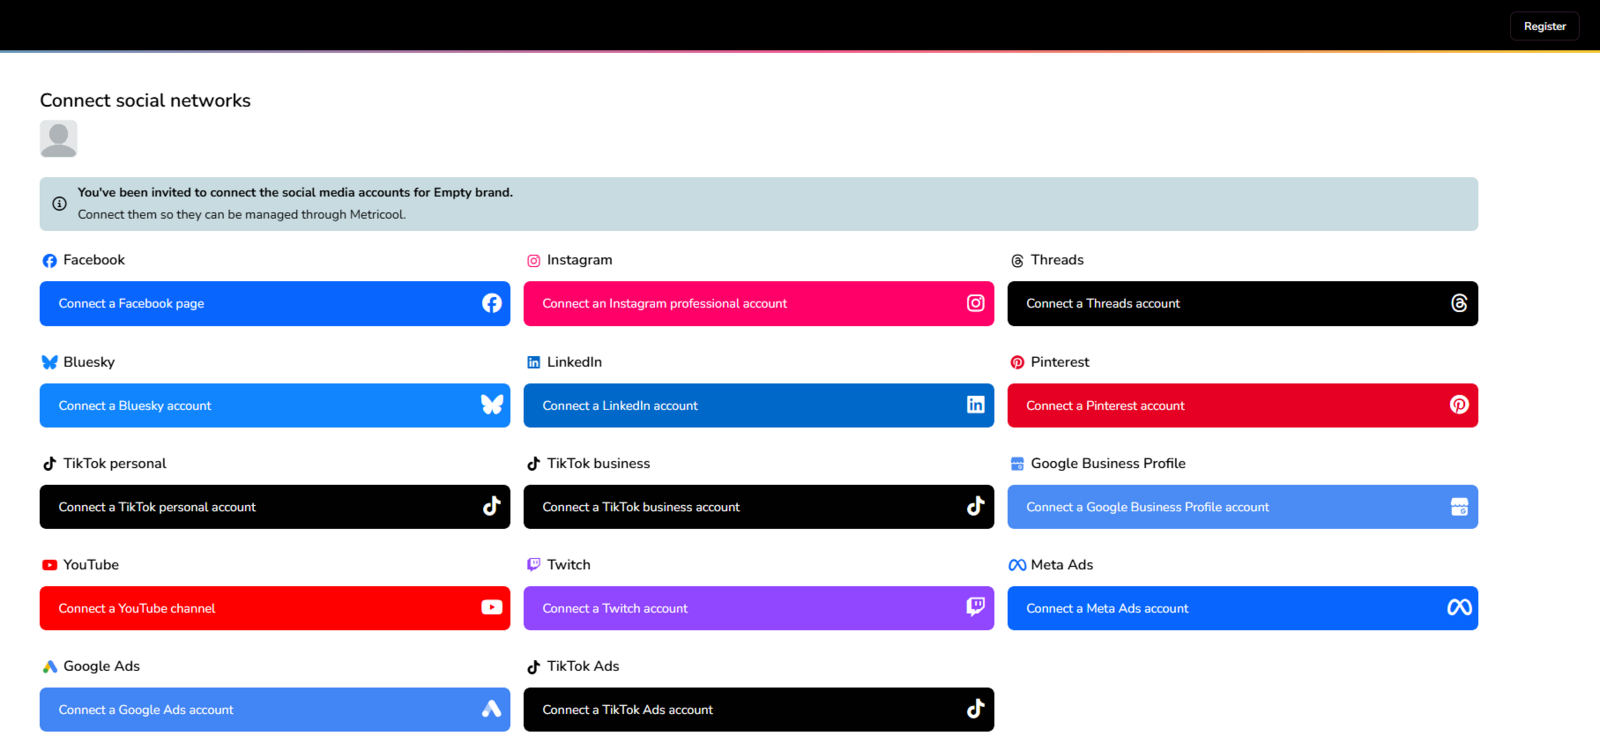
Connections Panel
🔗 From here, you can create a link to share the connections panel. Click the share button to automatically generate a link. Please note that—due to our collaboration with social networks and their need to identify the entity to which they grant permissions—the Metricool logo will be visible during the connection process (of the first social network) in the Connections Panel.
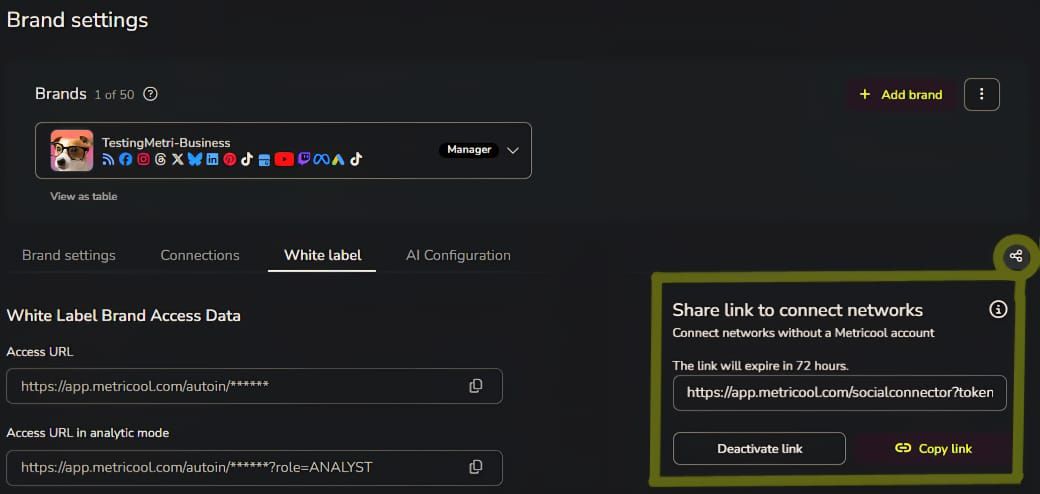
This feature is useful for agencies that do not handle the connection of platforms themselves and want their clients to do it. You can share the link with yourself as a test to verify how it looks. As a result, your client will see this window, where only the brand information is displayed.