
How to connect Metricool’s MCP
Updated last month
Interface screenshots are shown in English
Connect Metricool’s MCP (Model Context Protocol) server so an AI client can read and act on your Metricool account. Use the production URL https://ai.metricool.com/mcp, pick the connection method for your client, then authorize access.
For plan limits that still apply after you connect, see MCP limits and plan requirements. If the server will not connect, see I can't connect to Metricool MCP.
Before you start
Have these ready before you add the connector:
A Metricool account on any plan, including Free. Your plan limits still apply to MCP usage.
An account on the AI client or automation tool you want to connect, with permission to add external MCP connectors or URL-based tools. Client-specific requirements (for example Claude Code Pro/Max or Cursor Desktop) are listed in MCP limits and plan requirements.
Production MCP URL:
https://ai.metricool.com/mcp
Review the privacy policy of the app you connect before authorizing access to your Metricool account.
Available connection methods
Match your client to one connection method. Using the wrong method is a common reason the server never finishes connecting.
Connection method | Description | Supported tools |
|---|---|---|
URL-based (HTTP/OAuth) | Paste the MCP URL, then sign in to Metricool and grant access. | ChatGPT, Make, Zapier, Smithery, Mistral Vibe, Cursor, TypingMind |
Header token | Authenticate with a header token in the client. | N8N |
CLI | Add the server from the terminal, then authenticate when prompted. | Claude Code, Gemini CLI |
mcp-remote | Run Metricool through | Claude Desktop |
If you are not working from a terminal, start with a URL-based (HTTP/OAuth) client.
What permissions the MCP grants
When you connect MCP, the AI tool can access these parts of your Metricool account within your plan limits:
See and manage all your brands and their network connections
See and download all your metrics and reports
See, create, and publish posts in any connected network
See and manage all your Smartlinks
See and manage all inbox messages and post comments
See and manage all GMB reviews
See and manage the Ads campaigns of the accounts connected to any of your brands
See and manage your autolists
See folders and files of any Canva or Drive accounts connected to Metricool
These permissions grant full access similar to signing in directly. Only authorize tools you trust. Revoke access from the AI client or platform where you connected Metricool.
Choose your client
ChatGPT and Claude have dedicated setup guides. Use the sections below for the other supported clients.
How to connect Metricool's MCP with Claude (Claude Desktop and Claude Code)
Make
Go to a new scenario in Make.com.
Add a new module and search for MCP.
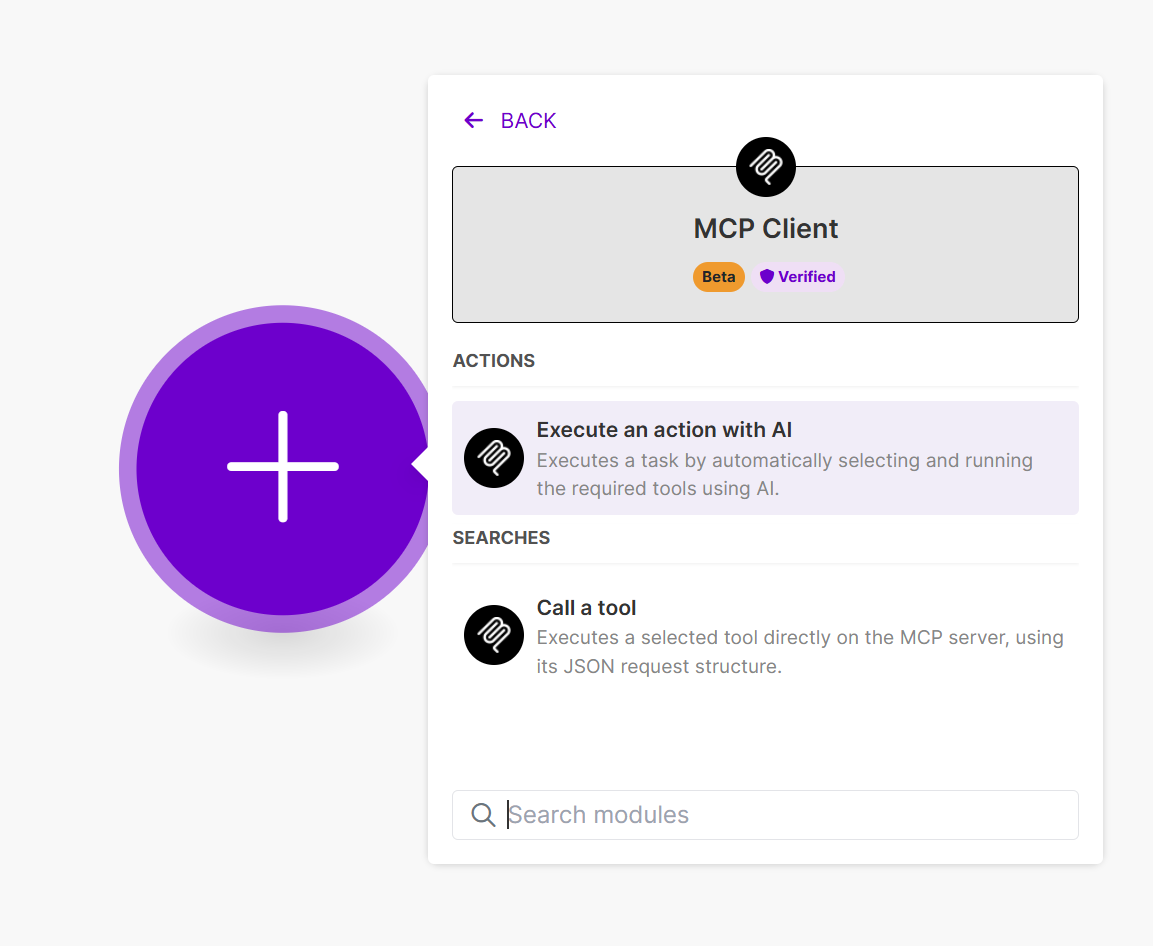
Create a connection.
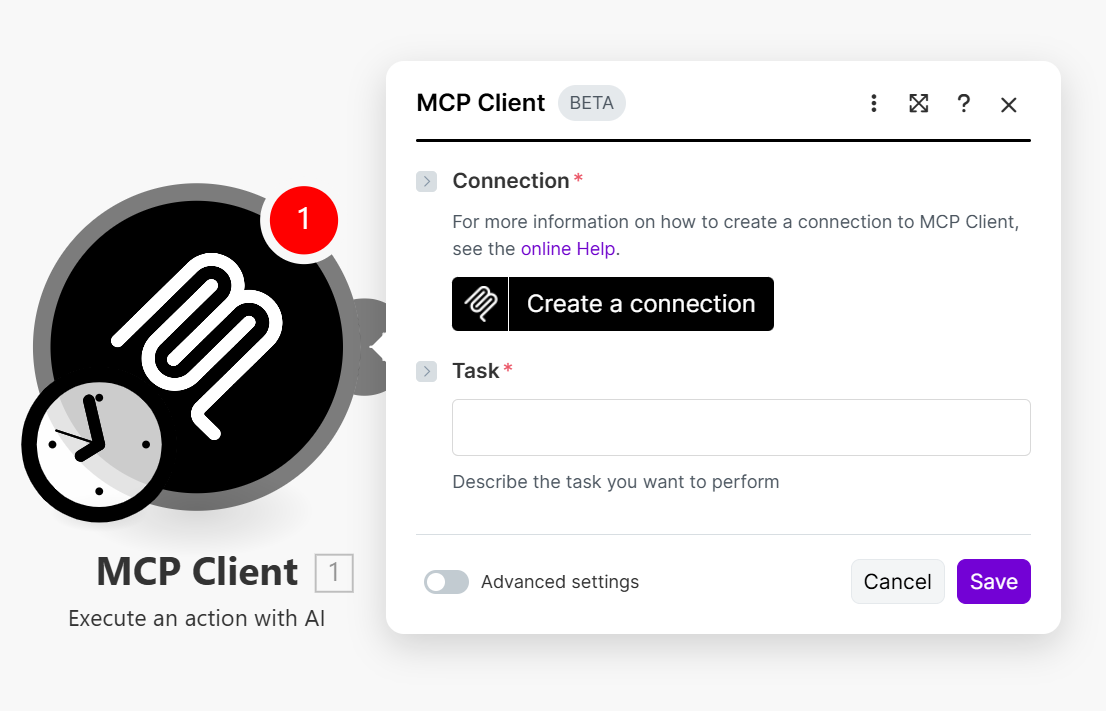
Add a new MCP server, enter the Metricool URL
https://ai.metricool.com/mcp, and click Save.
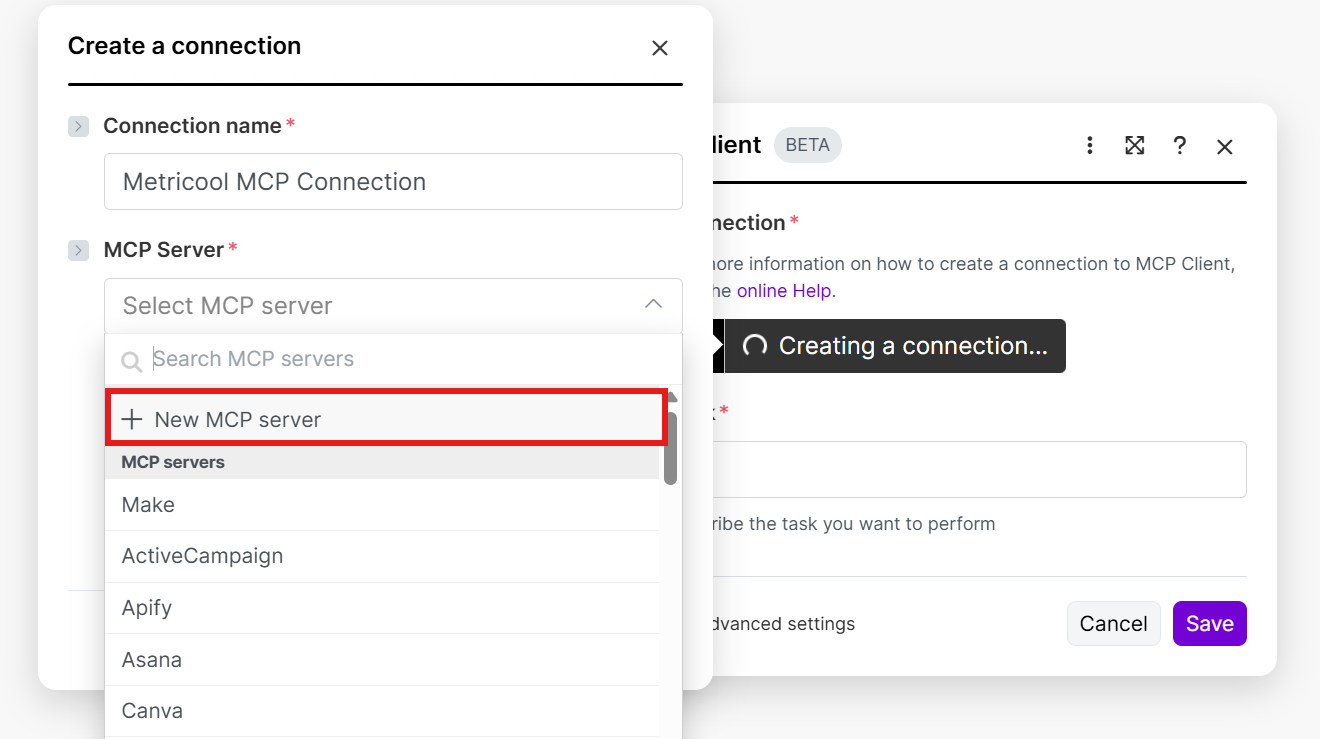
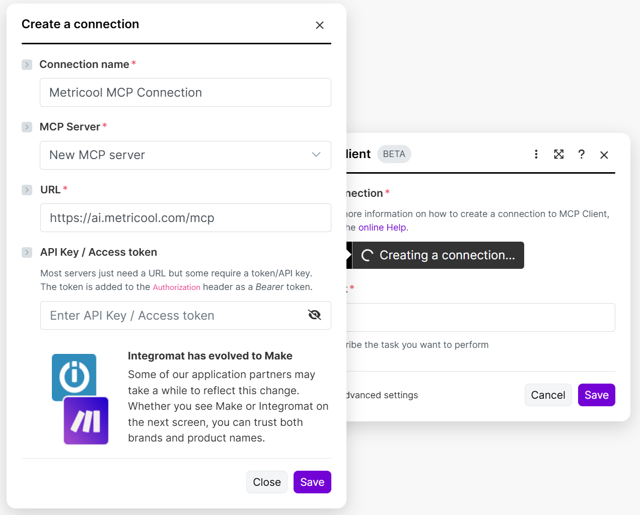
Sign in to Metricool in the browser window that opens and grant access.
Use Metricool MCP in the scenario by selecting a tool or by describing the task in a prompt.
Zapier
Go to Zapier.com and start a new Zap.
Add a new Action, search for MCP, and choose MCP Client.
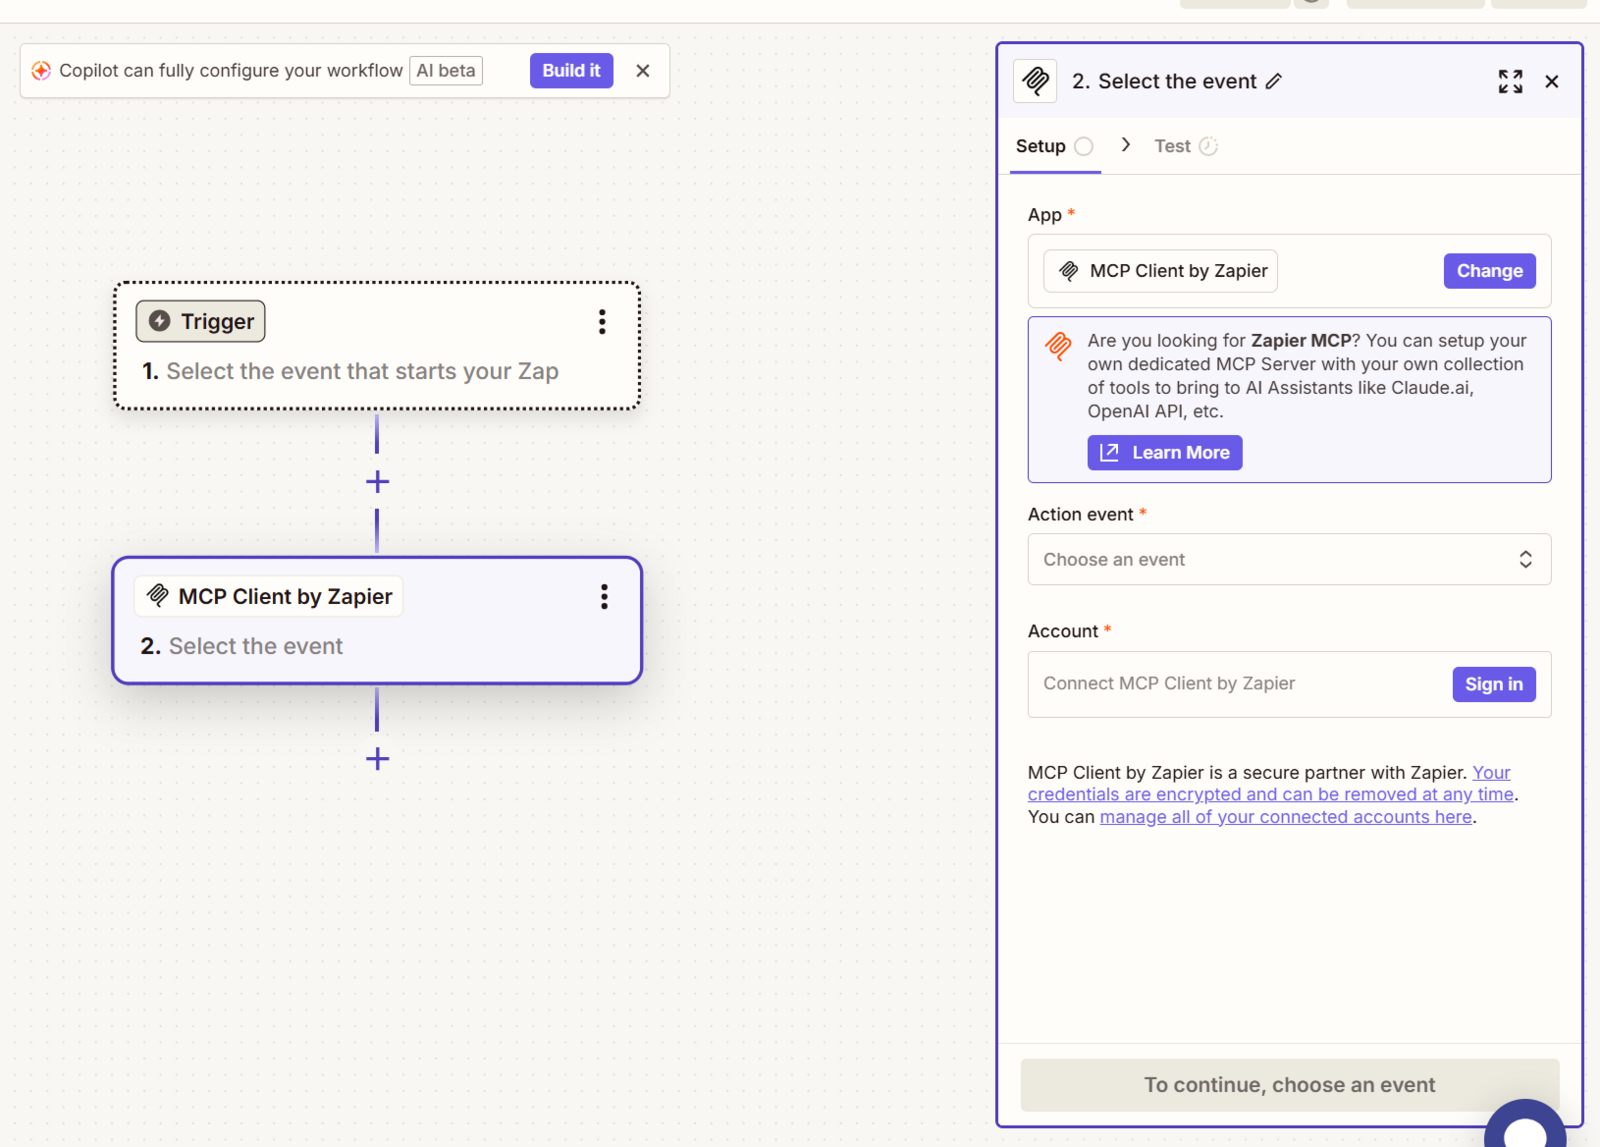
Open Sign In, add the Metricool MCP URL, and continue.
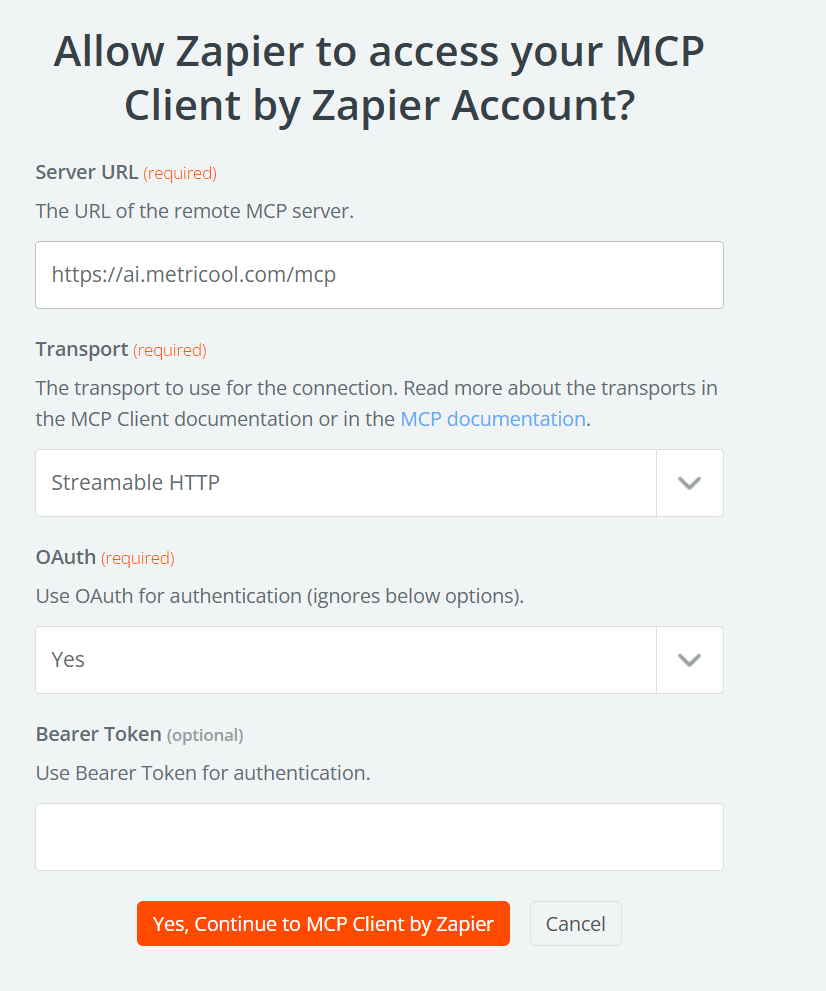
Sign in to Metricool and grant access.
Use Metricool MCP inside the Zap.
Smithery
Open the Smithery playground: https://smithery.ai/playground.
At the bottom, in the text box, click Add tool.
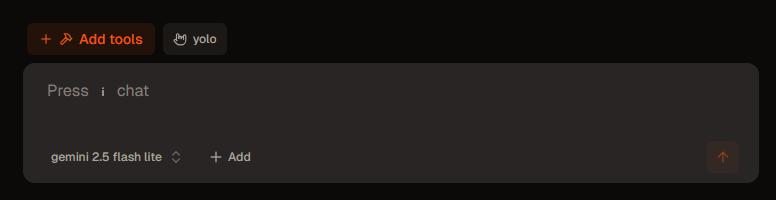
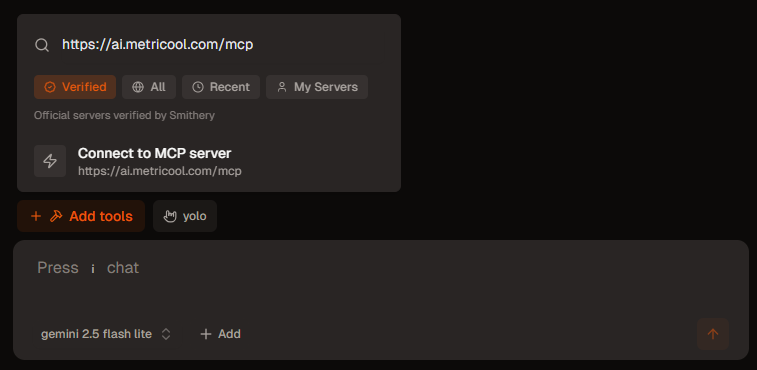
Enter the Metricool MCP URL in the search bar and click Connect to MCP server.
Grant the MCP access to your Metricool account.
When the connection is established, the available tools appear and the server is ready to use.
Mistral Vibe
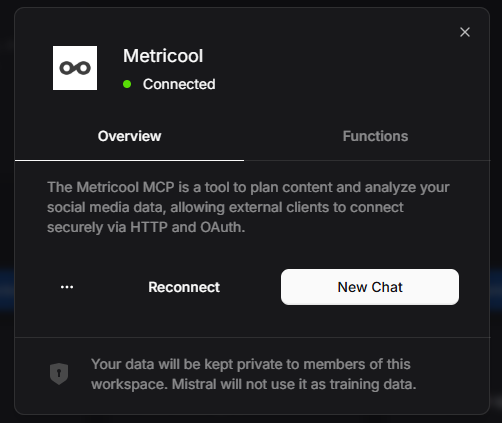
Connect Metricool’s MCP in Mistral Vibe by adding a custom connector with OAuth 2.1.
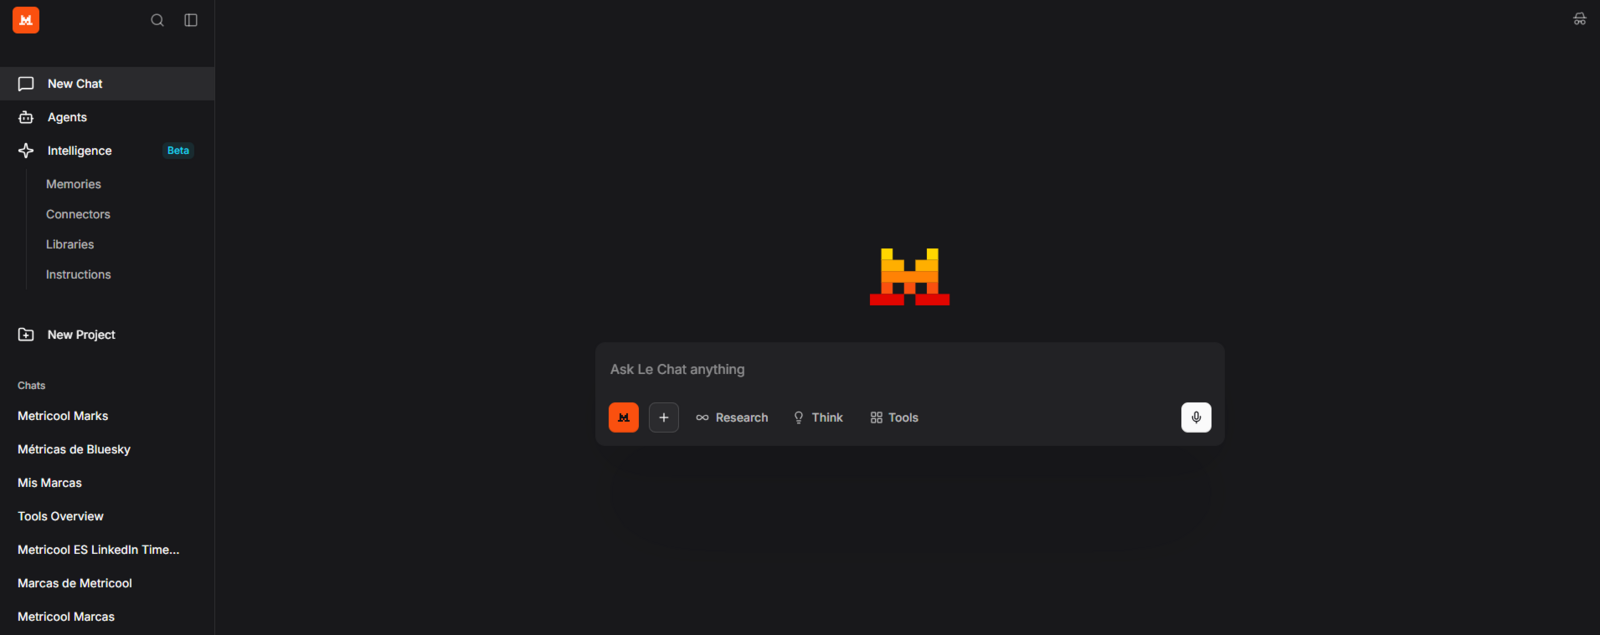
Open Mistral Vibe.
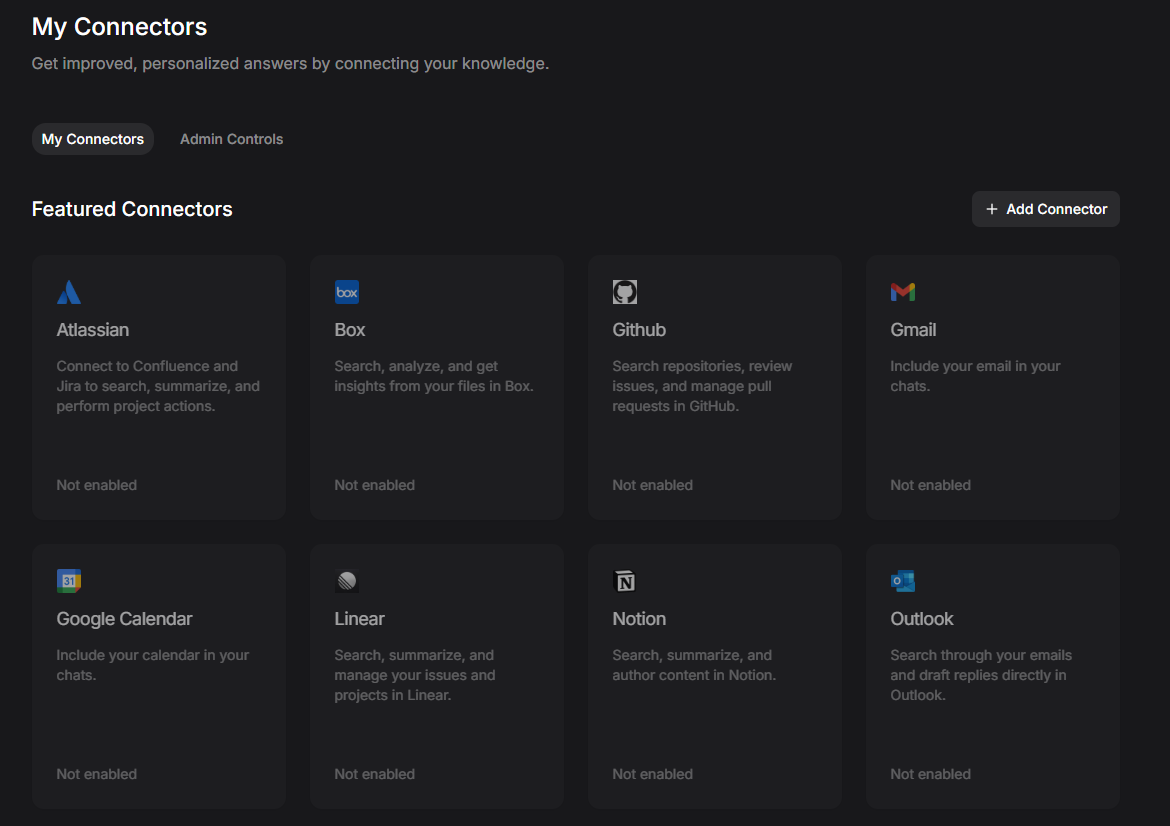
Go to Connectors in the left-hand panel, then click + Add Connector.
On the featured connectors page, click Add connector.
In Custom MCP Connector, enter a connector name, the connector server URL
https://ai.metricool.com/mcp, an optional description, and authentication method OAuth2.1, then click Connect.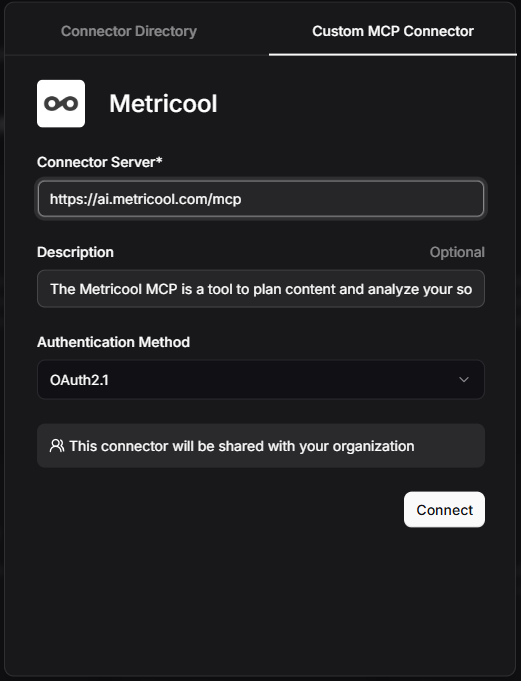
Grant the MCP access to your Metricool account.
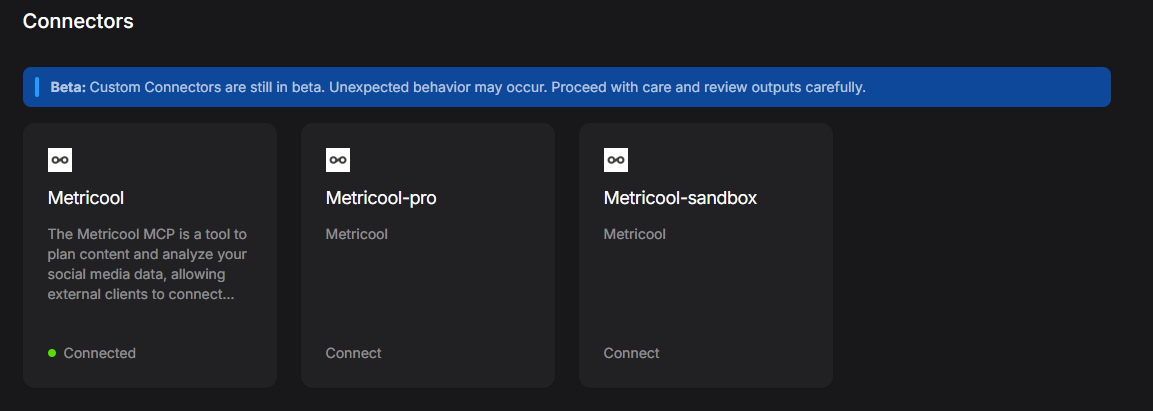
Metricool appears in your available connectors for chat or to view tools.
Cursor
Cursor MCP setup requires the Cursor Desktop app. After you sign in, use either install path below.
Install with a Cursor link
Open one of these links in your browser:
Deep link:
cursor://anysphere.cursor-deeplink/mcp/install?name=metricool-mcp&config=eyJ1cmwiOiJodHRwczovL2FpLm1ldHJpY29vbC5jb20vbWNwIiwidHlwZSI6Imh0dHAifQ%3D%3DWeb link: Install Metricool MCP in Cursor
Cursor Desktop opens and asks whether to add the MCP server.
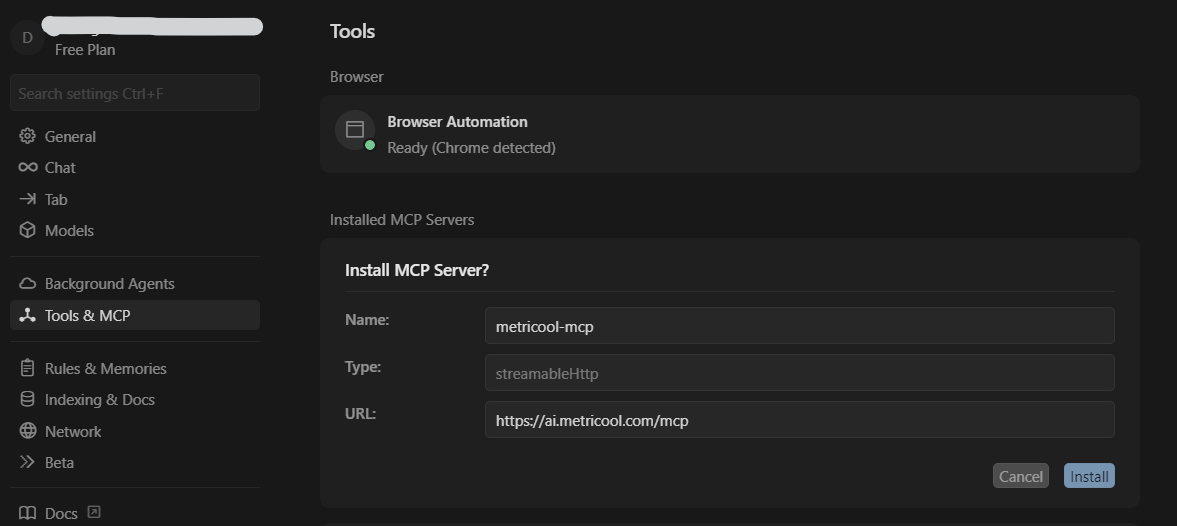
Click Install. In the Installed MCP tab, the server appears and needs authentication — click Connect.
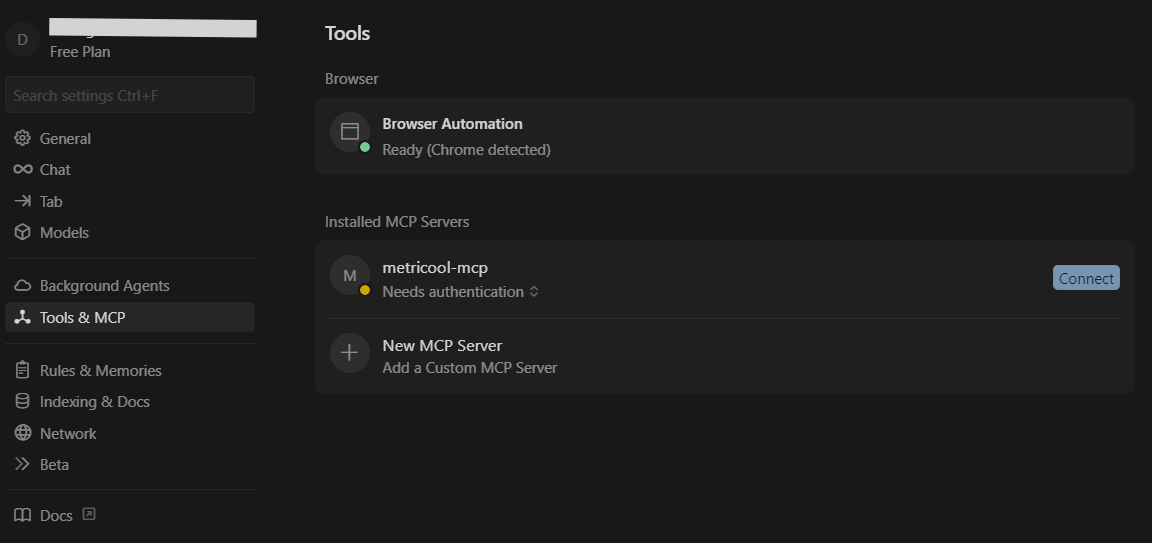
Authorize Metricool in the browser when prompted.
Return to Cursor. Metricool MCP is connected.
Install without a Cursor link
Open the settings gear at the top right, then go to Tools & MCP.
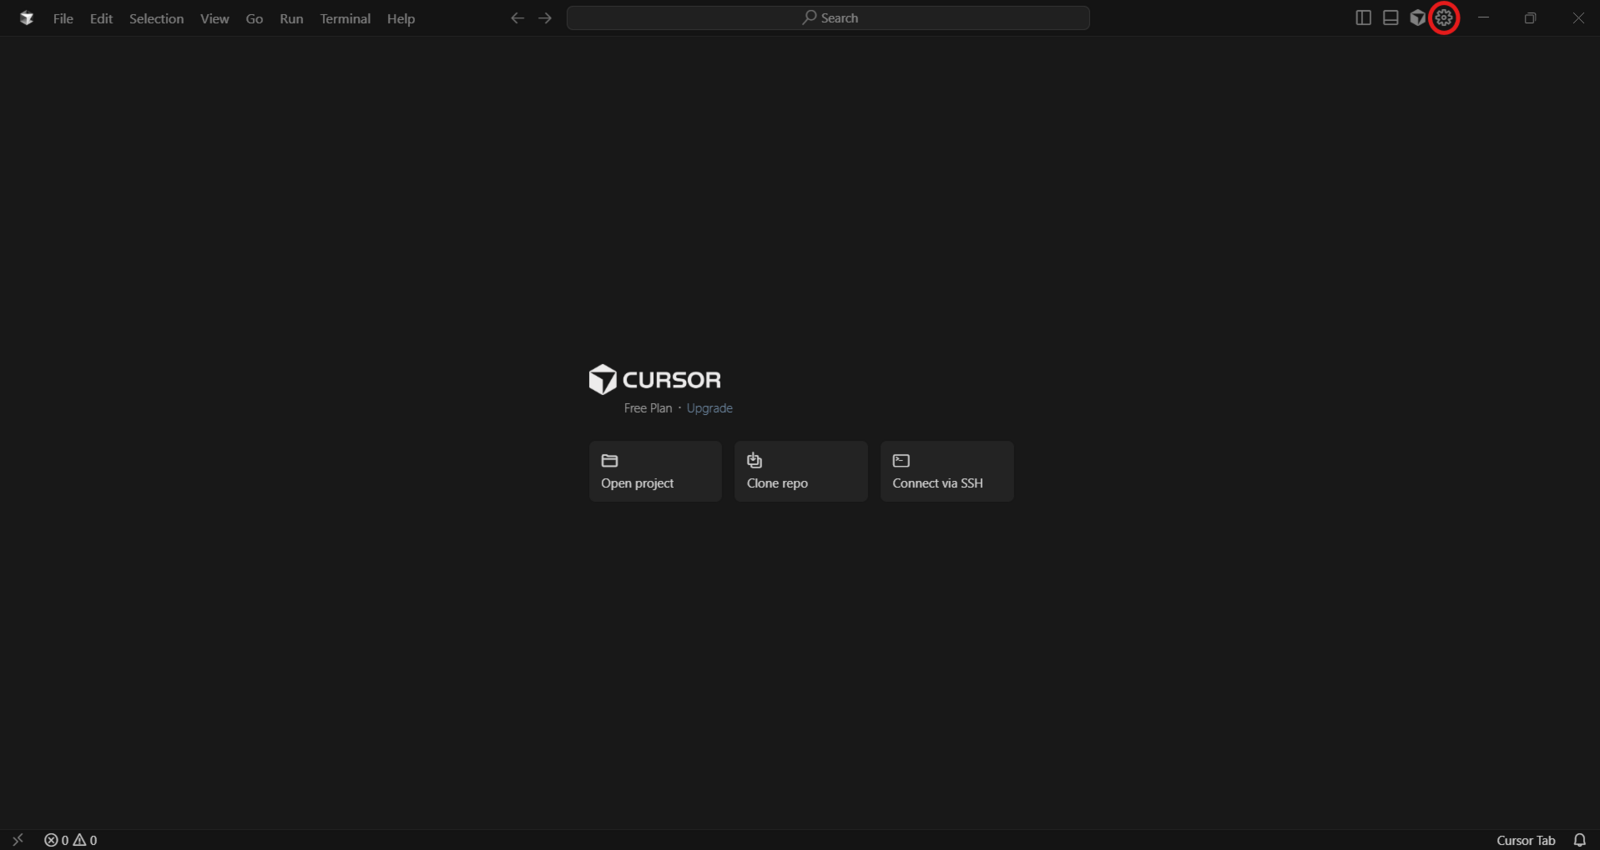
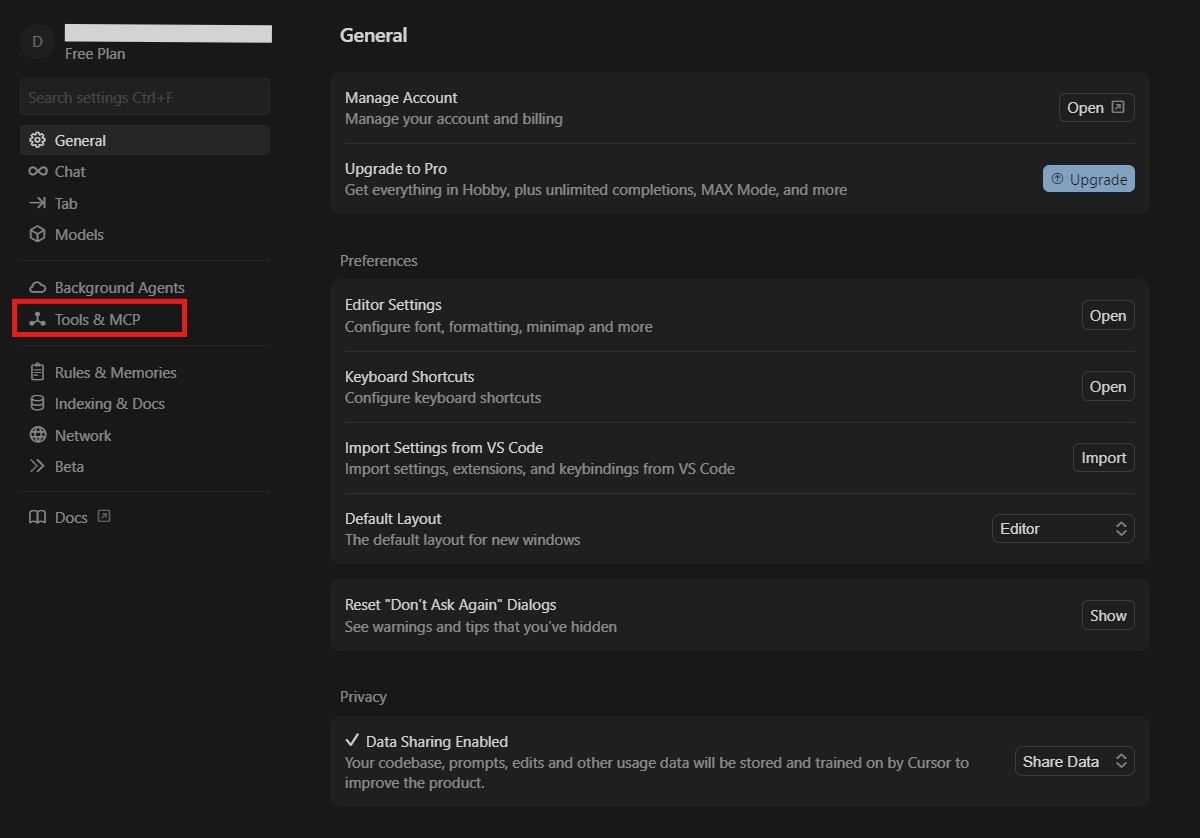
Click Add Custom MCP to open the
mcp.jsonfile.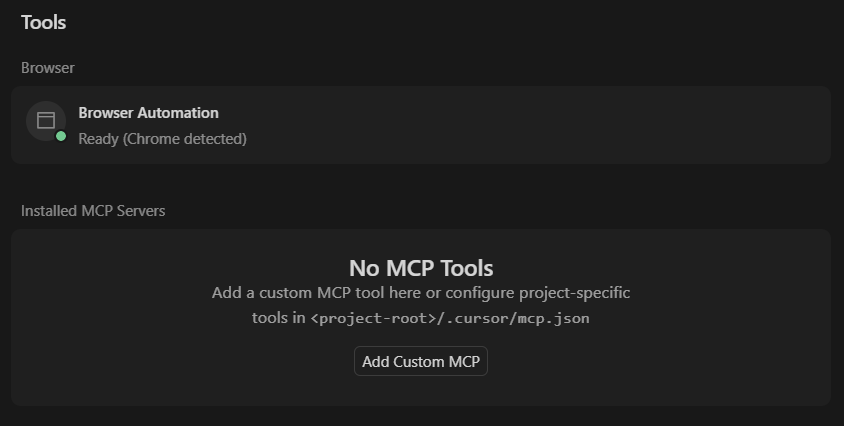
If no MCP is connected yet, the file looks like this:
{
  "mcpServers": {}
}
Add Metricool inside
mcpServers:"metricool-mcp": { "url": "https://ai.metricool.com/mcp", "type": "http" }The full file should look like this:
{
  "mcpServers": {
    "metricool-mcp": {
      "url": "https://ai.metricool.com/mcp",
      "type": "http"
    }
  }
}
Save the file (Files > Save).
In Tools & MCP, Metricool appears as unauthenticated. Click Connect.
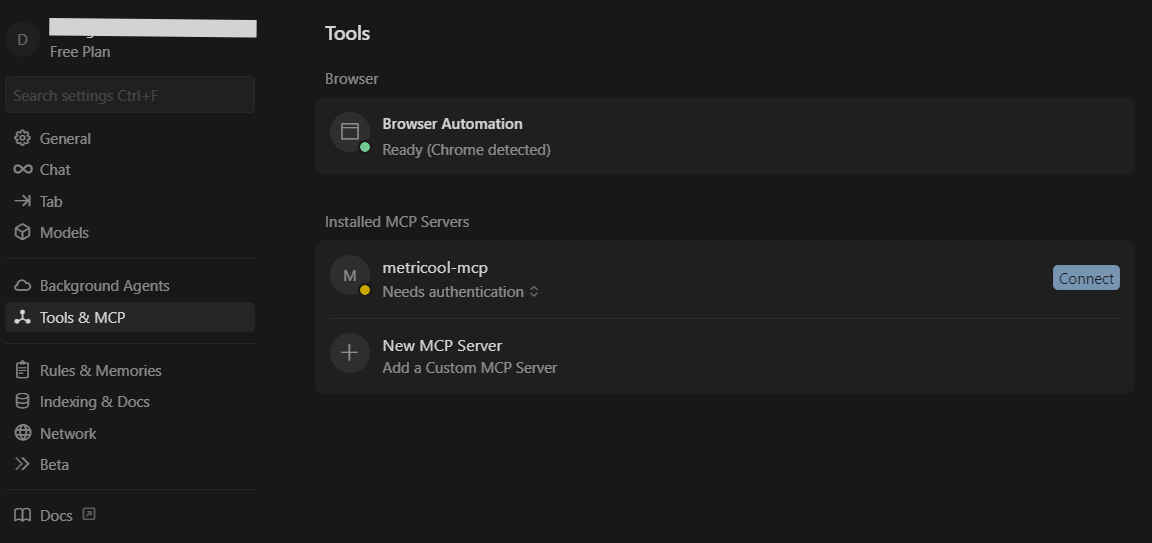
Authorize Metricool in the browser when prompted.
Return to Cursor. Metricool MCP is connected.
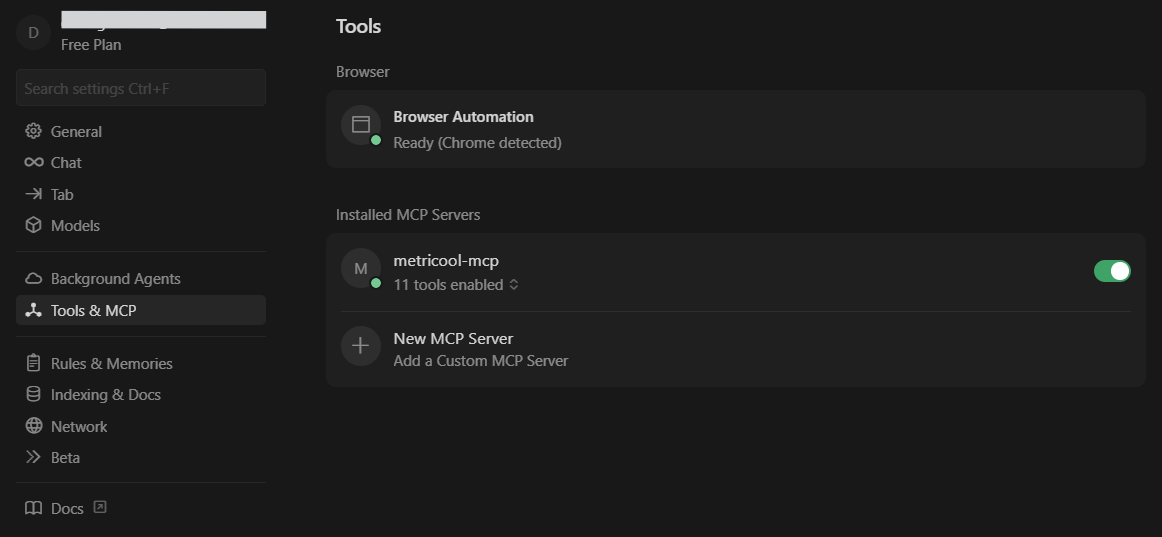
TypingMind
Connect Metricool’s MCP in TypingMind with URL-based OAuth. No token or local server install is required, and this works on any Metricool plan, including Free.
In TypingMind, do not use the sidebar MCP section for Metricool. That area is for local or debug MCP servers you run yourself. Connect Metricool from Settings → Advanced Settings → Model Context Protocol (or Plugins → MCP Connectors, depending on your TypingMind layout).
In TypingMind, go to Settings → Advanced Settings → Model Context Protocol → Add custom connector.
In the URL field, enter
https://ai.metricool.com/mcp.Click Connect.
The first time, choose TypingMind Cloud when asked which connector to use.
Authorize with your Metricool login in the browser and accept access.
If you only see a token-based connection option, that path uses the Metricool API and requires Advanced. Prefer the OAuth URL method above on Free and other plans. See MCP vs API access: what is the difference?.
N8N
N8N uses header token authentication, not the URL-only OAuth flow used by most other clients.
In N8N, create a new workflow.
Add an AI Agent node.
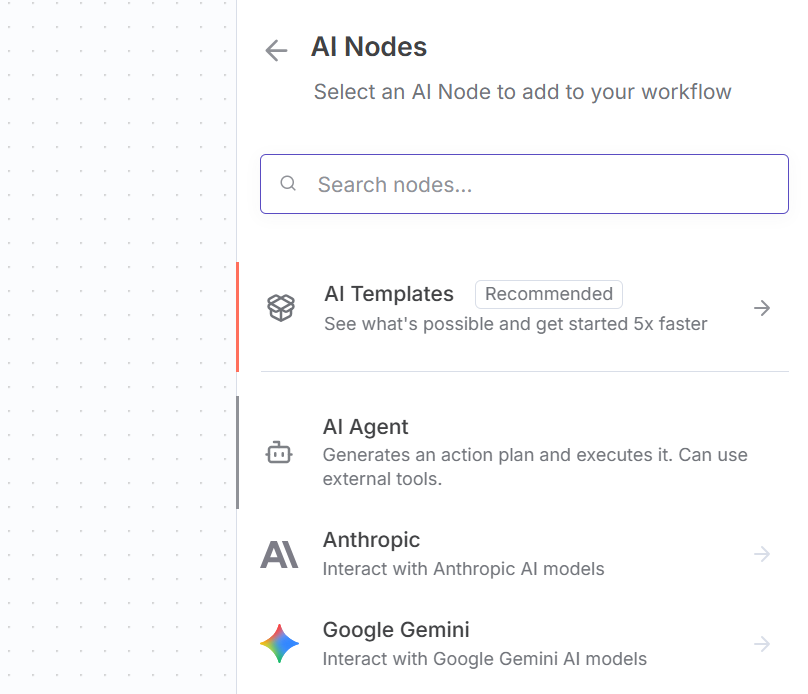
In the AI Agent tools, search for MCP Client Tool.
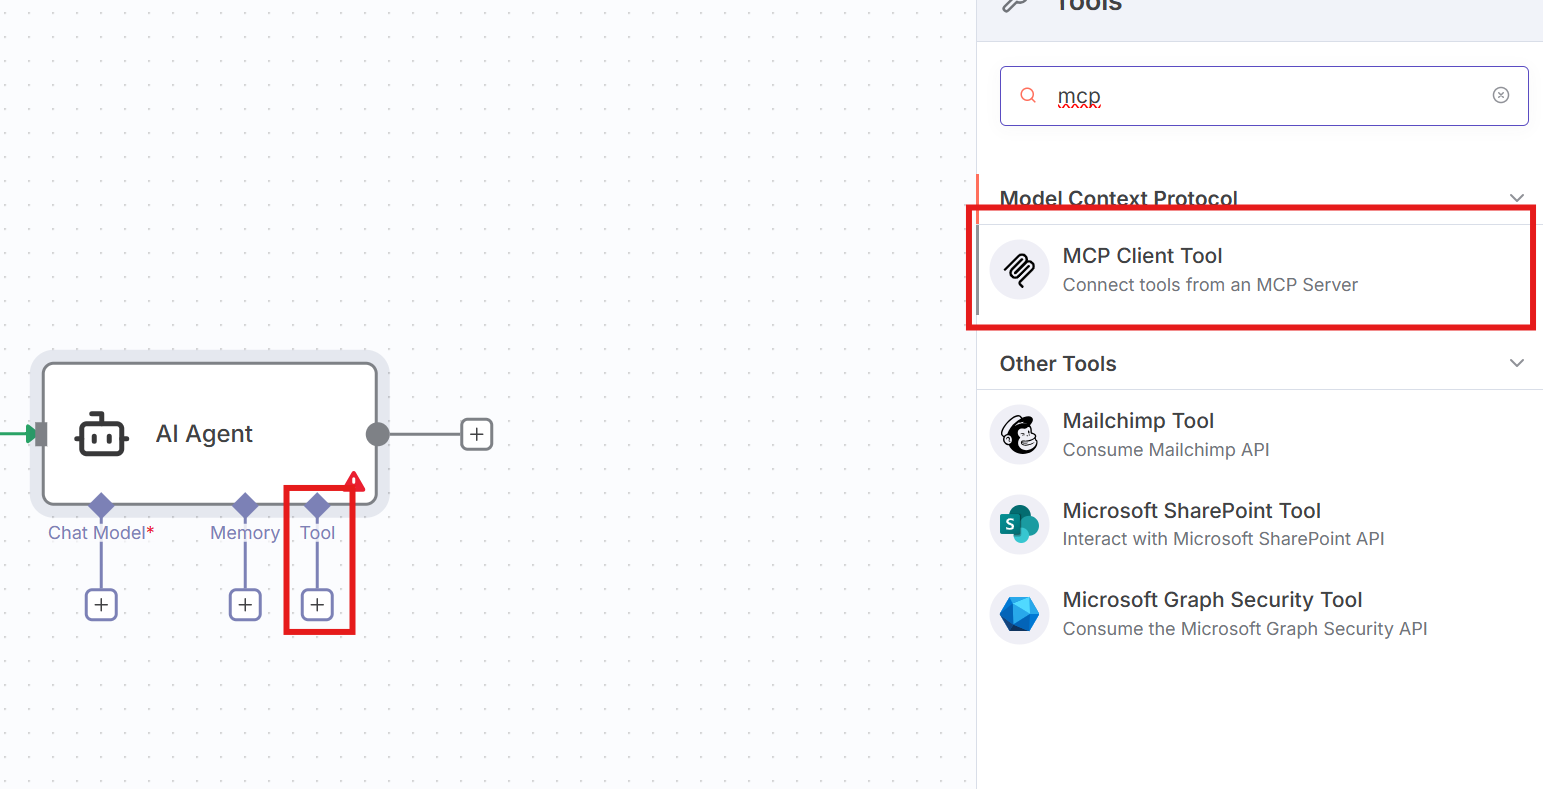
Set the endpoint to
https://ai.metricool.com/mcp.Set Authentication to Header Auth.
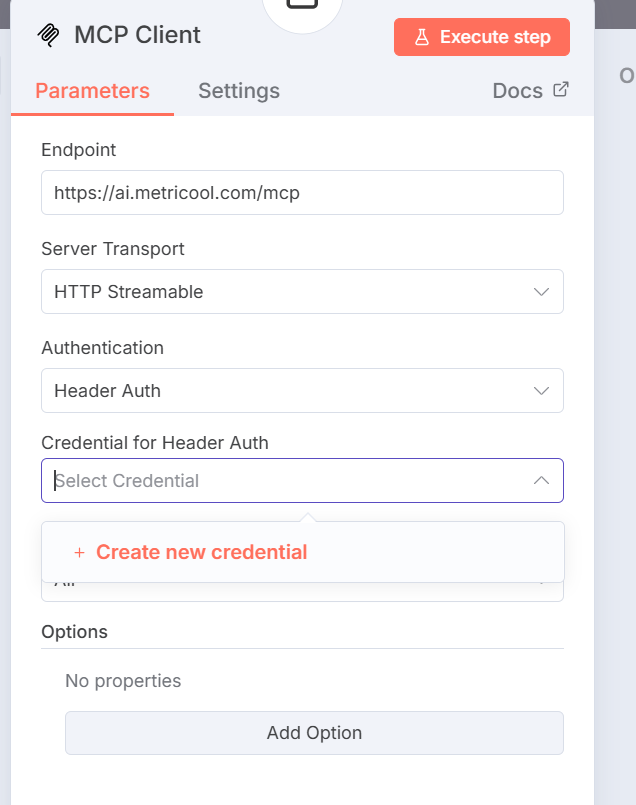
Create a new credential.
Set the header name to X-Mc-Auth.
Set the value to your Metricool API key from Account Settings > API.
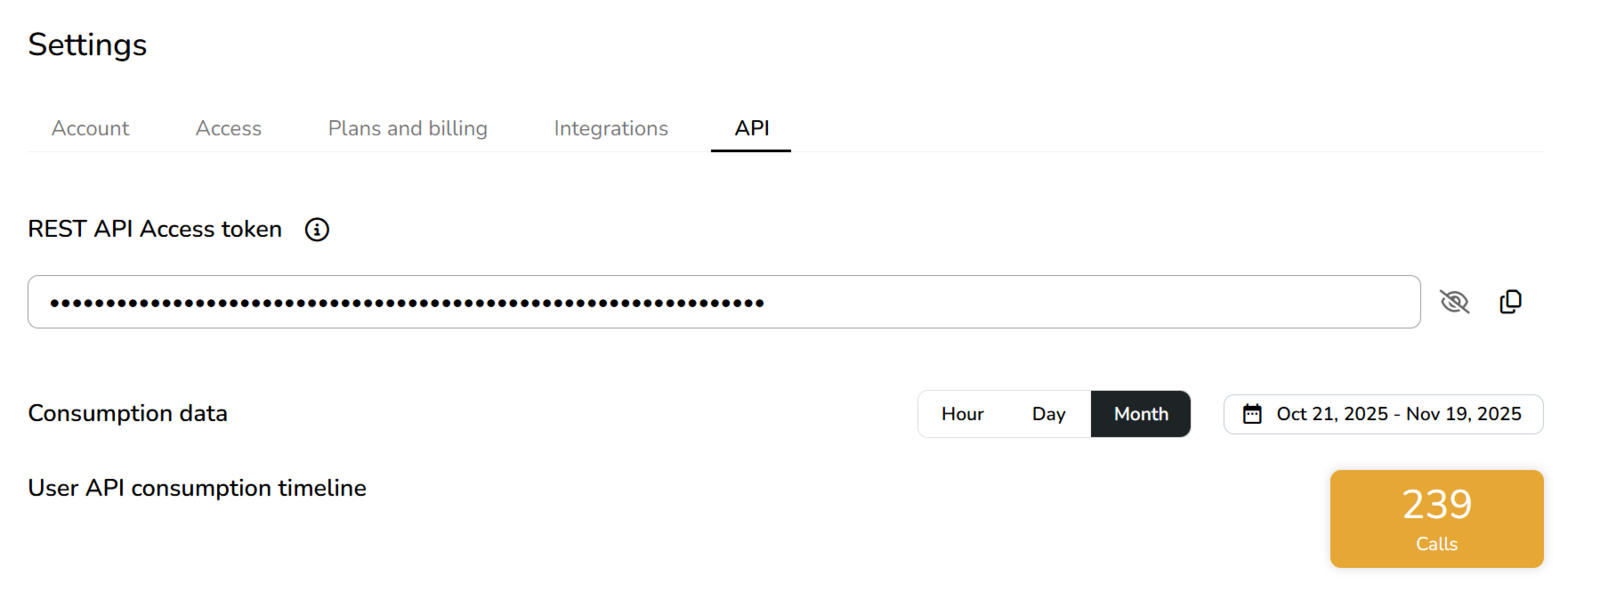
Save the credential.
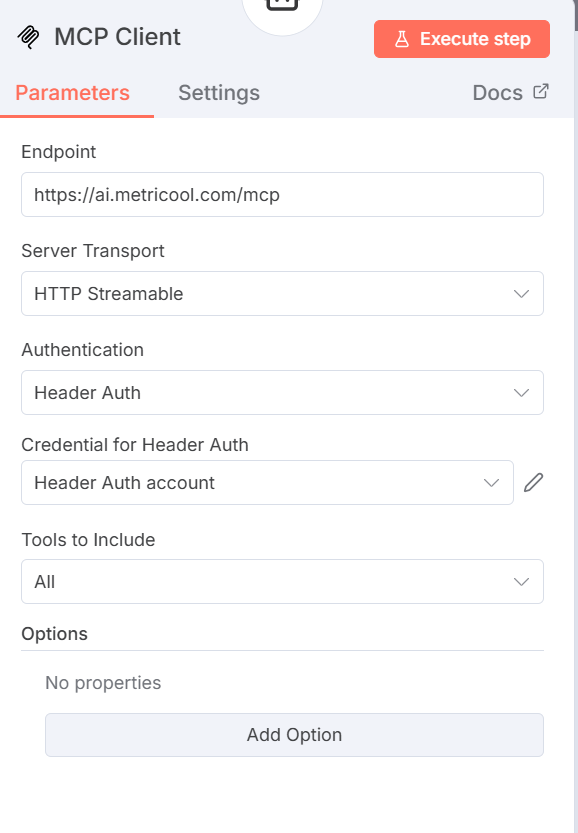
Use Metricool MCP inside the N8N workflow.
Gemini CLI
Install Gemini CLI from a terminal:
npm install -g @google/gemini-cliOpen the configuration file in one of these paths (or the path set by
GEMINI_CLI_SYSTEM_DEFAULTS_PATH):/etc/gemini-cli/system-defaults.json(Linux)C:\ProgramData\gemini-cli\system-defaults.json(Windows)/Library/Application Support/GeminiCli/system-defaults.json(macOS)
Add this configuration:
{
  "mcpServers": {
    "metricool": {
      "httpUrl": "https://ai.metricool.com/mcp"
    }
  },
  "security": {
    "auth": {
      "selectedType": "oauth-personal"
    }
  }
}
Save the file, start Gemini CLI with
gemini, then run:/mcp auth metricoolAuthorize Metricool in the browser tab that opens.
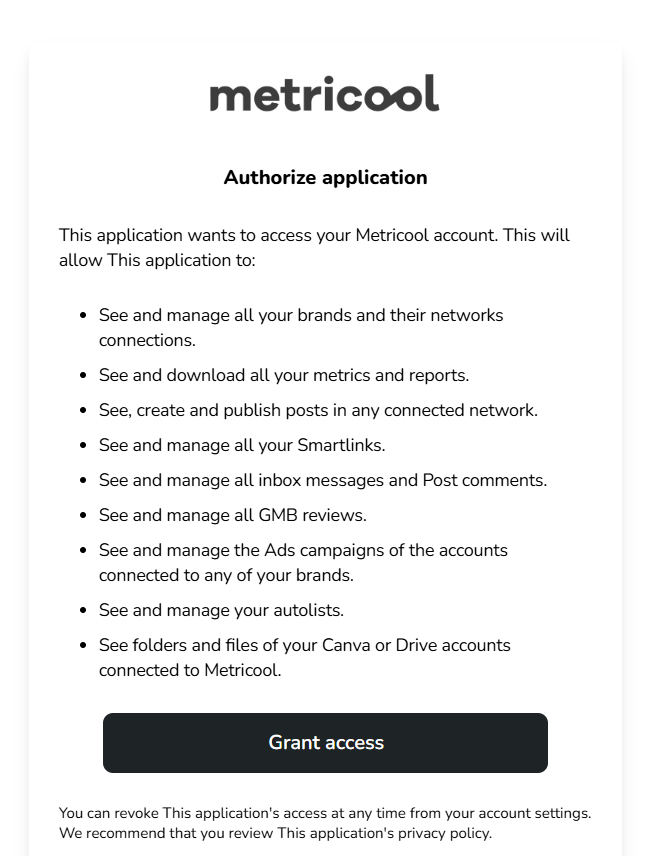
Return to the terminal. Metricool MCP is connected.
Related articles