
Schedule content from an Autolist
Updated 4 days ago
Autolists let you create lists of posts that repeat automatically at the frequency you choose, so you stay active on social networks and recycle your content. You can schedule your posts periodically and take the hassle out of managing your social networks in just a few steps:
Create your content list
Organize the posts you want to publish.
Set the frequency
Choose the days and times for your posts.
Automate publication
Let the autolist do the work for you.
Good to know
Post limit: Each autolist can include up to 200 posts. If you exceed this limit, additional posts will not be published.
Tags on Instagram: It's not possible to tag people or products in posts from an autolist.
Attachments: The maximum allowed in autolists is 10 attachments per post.
Overview and scheduling with autolists

The overview shows the date of the next post, the active networks, the pending posts, and if the repetition is activated. From here, you can activate or deactivate each autolist and delete them by clicking the trash icon.
The posts will be published in the set order and will be deleted once published, except if you activate the "repeat" option, which will make your list circular.
Each line adds a time, and in each one, you can select the days of the week. The autolist will be read vertically daily.
Here's an example:

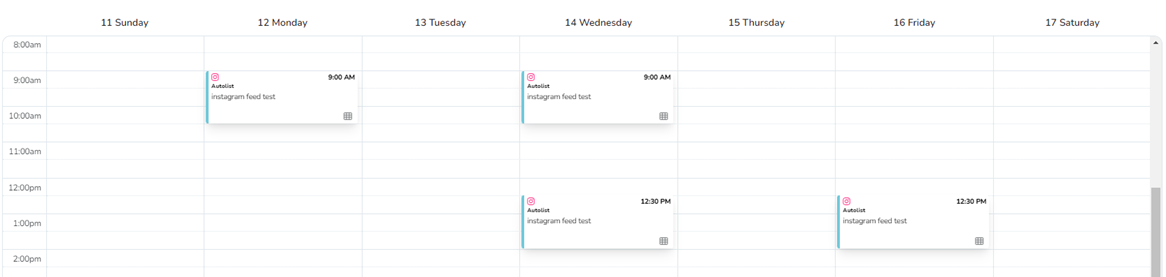
With this schedule, the content will be published in the following chronological order: Mondays at 9:00 AM, Wednesdays at 9:00 AM and 12:30 PM, and Fridays at 12:30 PM.
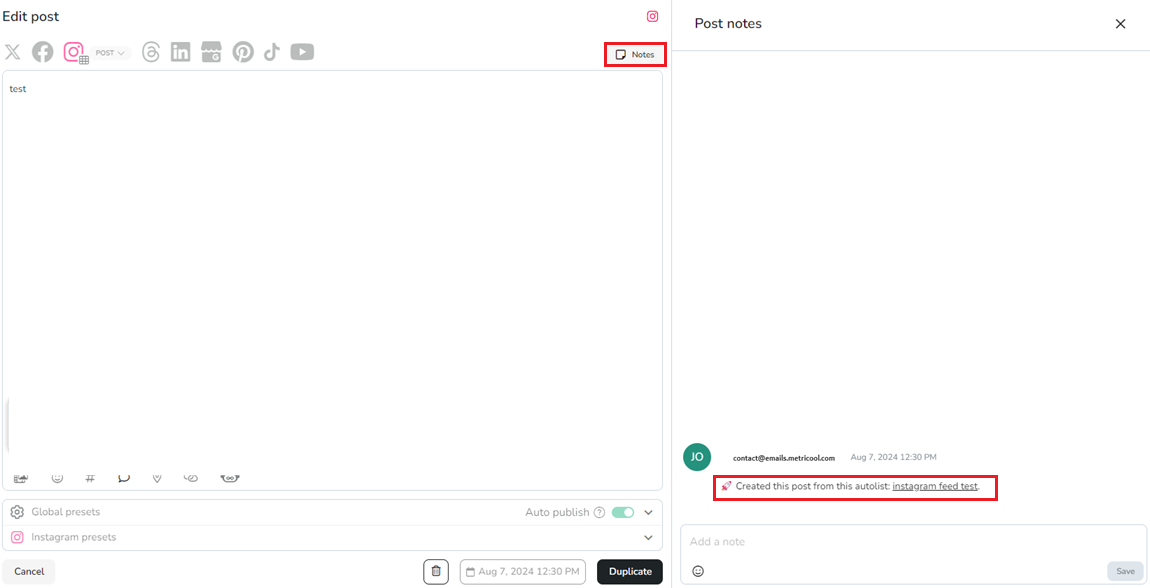
This is how it will look in the calendar of scheduled posts from an autolist. Once the content is published, accessing the post notes, you can review what was scheduled from an autolist.
Glossary
We explain the main fields to configure your autolists successfully:
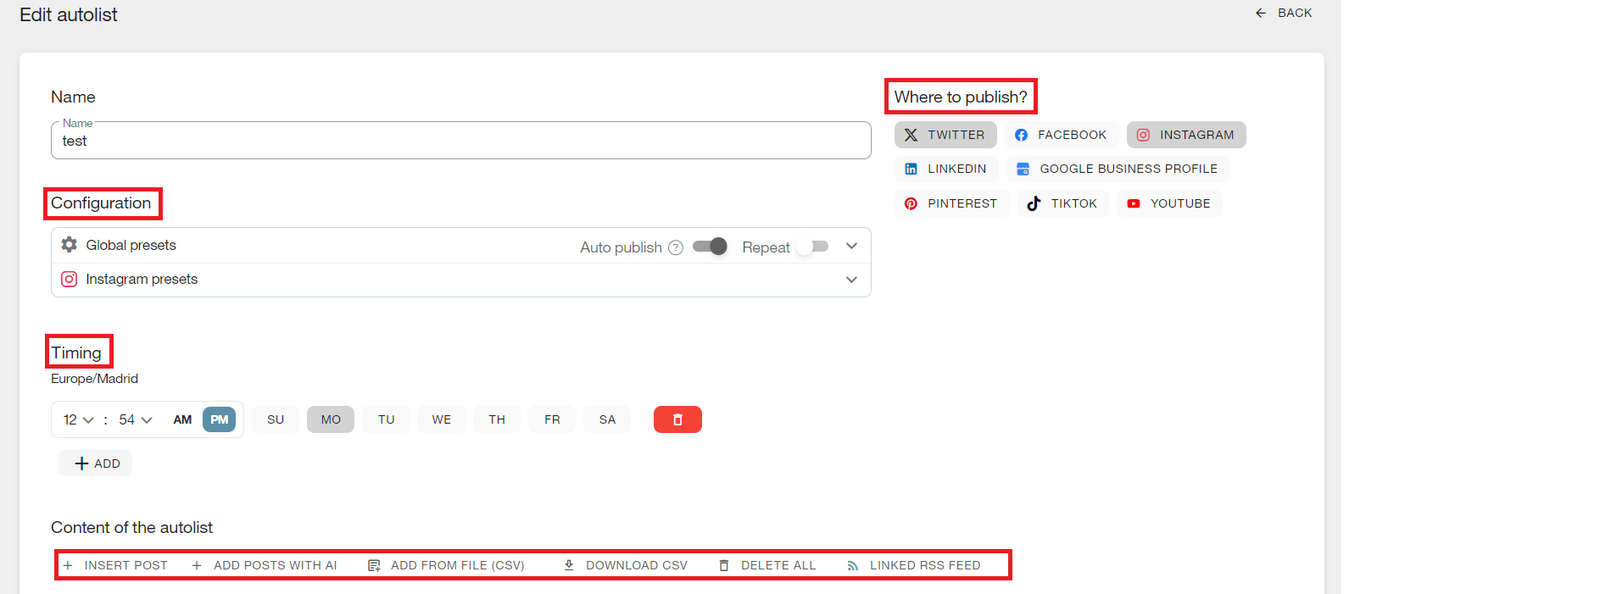
Name and configuration: create a name that defines the content that the list will contain (best posts, periodic tweets, etc.).
Repeat: the repeat option is used to turn the autolist into a circular list. Once content is published, it moves to the end of the list to be published again when its turn comes. If you do not activate the repeat option, when content is published, it is removed from the autolist to avoid being republished.
URL shortener: This connected feature will automatically shorten your URLs without the need for any other shortener. By using the Metricool shortener, you will have statistics on the clicks received on your links.
Networks to publish: Activate the social networks where you want to share your posts simultaneously. If you prefer, you can also create autolists to manage each social network independently.
Scheduling: schedule when the next post will be by choosing the time and days you prefer. We advise you to check your best times to post on each social network beforehand. Add as many rows as you want or select multiple days at once.
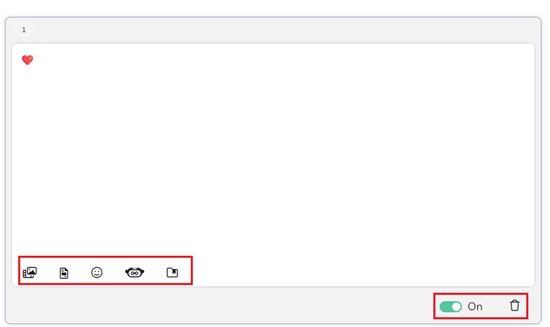
Post position in the list: the number next to the camera icon indicates the position it occupies, so you can quickly see which will be the next post. You can change the post position by dragging it to the desired position or clicking the number.
Pause button: An on/off button that allows you to pause any active post in your autolist. It is very useful when the post should not be published because it is seasonal content.
Save texts: add copy or hashtags that you usually use to include them with a click in the autolist. Click add at the beginning to see the options and click the folder icon.
Trash: A button to delete the added content from the list when you no longer want it to be published.
Set up your autolist

Click on New Autolist
Select the networks you want to include in the automatic list.
Set the global settings (here you can activate the repeat button so that your list is circular) and by social network.
Set the day and time for posting the content. Autolists have a weekly frequency, so add as many rows as you need.
Add the content.
Duplicate an autolist
To duplicate the content of an autolist, click on Download CSV (paid plans only), create a new autolist, and add the content again by clicking add from file (CSV). Set the new configuration and you're done.
Adding content
You can add content to your autolists by clicking on different options:
Insert post: you will manually add your posts. Once the first post is created, the add post to end option will be enabled.
Add posts with AI: you will create your posts with artificial intelligence, see the details in How to create posts with Metricool’s AI Text Generator.
Add from file (CSV): allows you to add posts in bulk, see the details in How to schedule posts in batch with a CSV file in Metricool.
Linked RSS feed: your posts will be added automatically based on your RSS feed settings (images will only be added for Instagram and Pinterest), see the details in How to link an RSS feed to an autolist.
Remember that in each post you can schedule different types of files, images, videos, or gifs. You can attach them from your PC, as a URL, from Google Drive or select material from our image, video, or gif library. You can also schedule documents for the LinkedIn social network. Additionally, you can add emojis.
To change the position of the posts, select and drag to the desired position or click on the position number.
Additional resources
📹 How to schedule content from an Autolist in Metricool — EN · ES · FR · DE
📝 Autolists: The Easy Way to Plan and Publish Your Content - Check language availability using the article selector
📝 What’s Evergreen Content and why it is important - Check language availability using the article selector