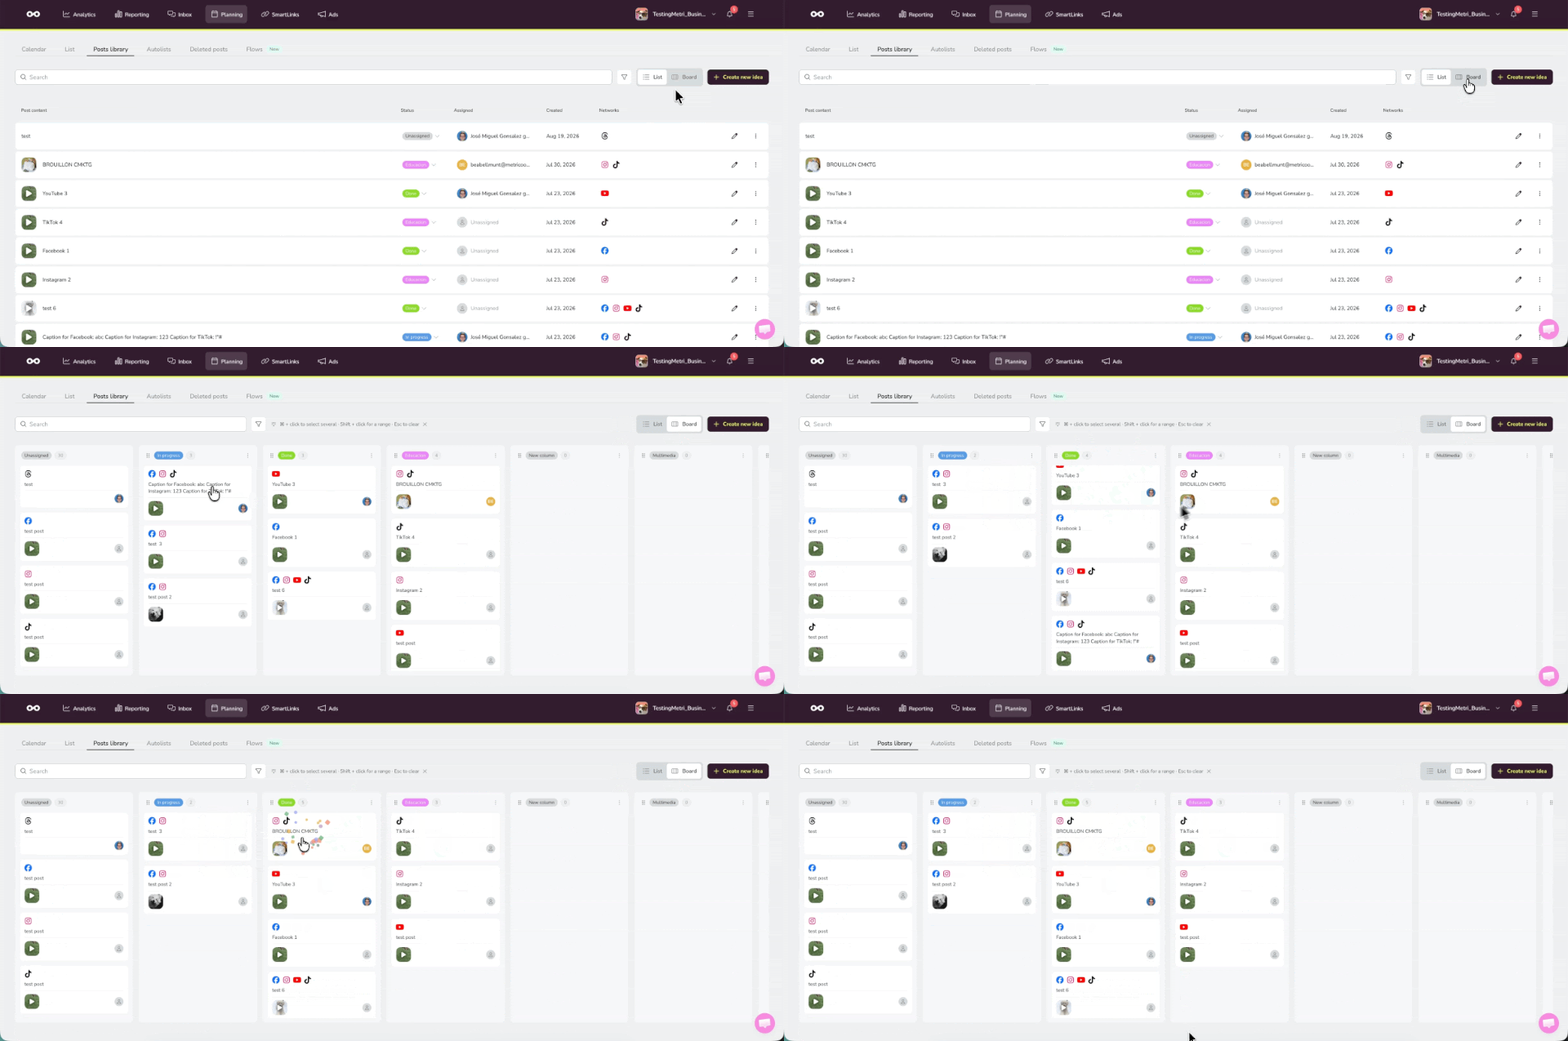
The Posts Library is a space within the planning media resources where you can save draft posts and ideas as templates, preparing them in advance without the need to set a specific publishing date, when the time is right, simply set the date, and you're good to publish!
This feature is available exclusively on paid plans and supports up to 250 saved ideas per brand.
The 250-post limit per brand cannot be increased. To add new posts when you reach this limit, delete existing posts from your library.
Also, if you're working with shared brands, the library is also shared between users who have permissions, making it easier to collaborate and work as a team.
Access the Posts Library
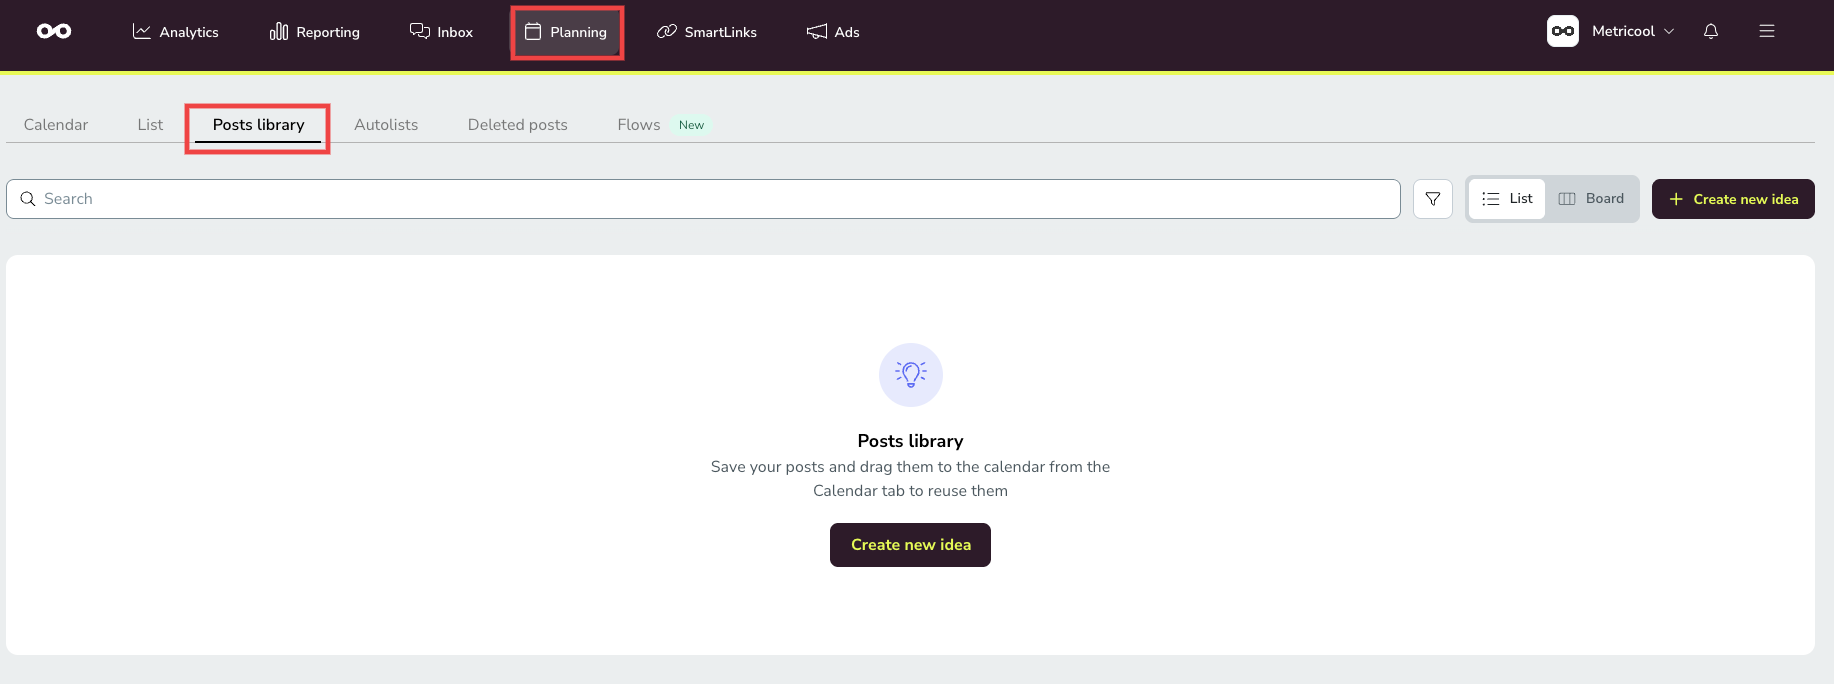
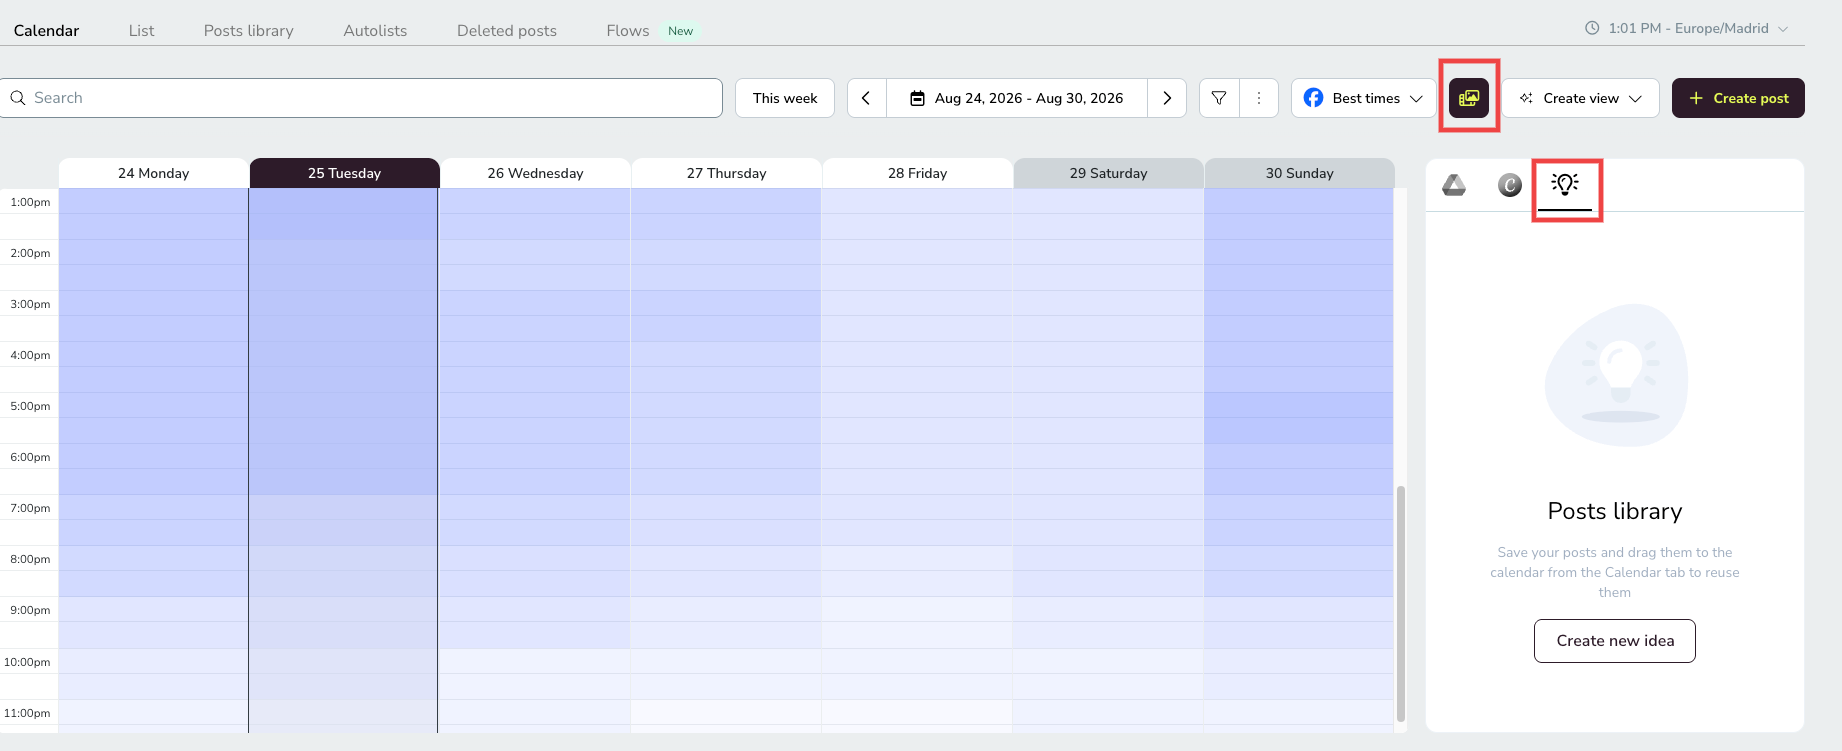
You can open the library from two places, and both give you the option to create a new idea.
Planning > Posts Library: opens the library directly in the board (kanban) or list view.
Calendar view: click the multimedia icon to open the listing of saved posts.
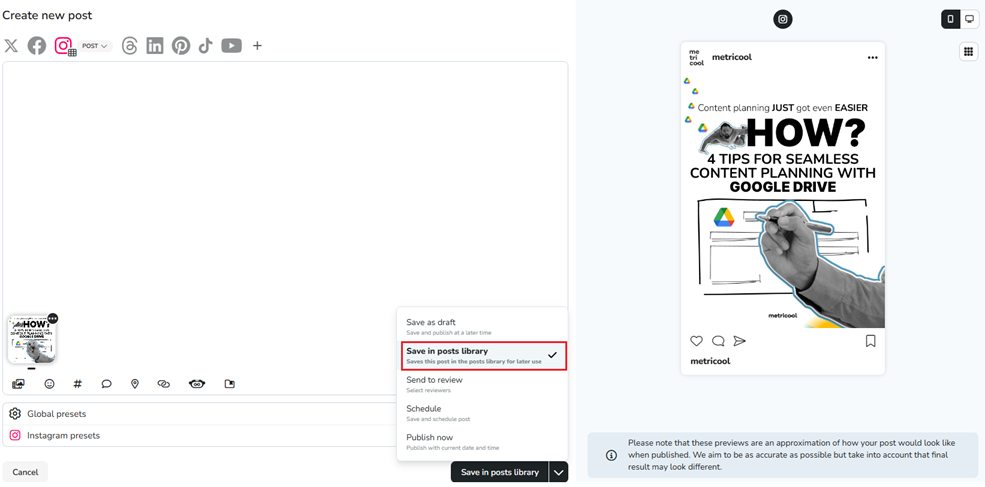
How to Save Posts in the Library
You have multiple ways to save your posts to the library, depending on where your content is currently located. From the library itself, Create new idea opens the same post editor as New Post; both are routes to the same place, so use whichever you reach first.
Creating a New Post : After creating a new post, select Send to Library instead of scheduling it. This saves the post as a draft without a publishing date, ready to be revisited and published whenever you like.
Duplicating Old Posts : If you have previous posts that you want to reuse, you can duplicate them and select Send to Library. This makes it easy to store the content for future use or adaptation.
Reusing Content from Analytics: In the Analytics posts list, open the three-dots menu next to a post that performed well and select Reuse content. Choose Send to Library to store these posts as reusable ideas.
Saving from Drafts : If you have an existing draft, open it in the post editor and click Save to Library to convert it directly into a Library Post without duplicating anything.
Only unpublished or unscheduled posts can be sent directly to the library. Published or scheduled posts must be duplicated before they can be saved to the library. Drafts can be converted directly.
You can schedule a saved post from the calendar view or from the library itself, in either the list or board view. In every case you finish by setting the date and time and choosing how to publish, such as scheduling it or sending it to review.
From the calendar view
Use the search bar or apply filters to find the post.
Click on the post or drag it to the calendar to schedule the post from the saved post.
Edit the post if need it.
Set the date and time and finish using the desired option.
From the list view
Click the post to open it in the editor.
Click Create post. This enables the date and time fields.
Set the date and time and finish, choosing to schedule, send to review, or another option.
From the board view
Click the post card to open it.
Click Create post. This enables the date and time fields.
Set the date and time and finish, choosing to schedule, send to review, or another option.
List view for your posts library
The list view shows your saved posts as rows, with columns for the title, status, assigned member, date, and networks. Each status appears with its own colour, so you can spot where a post sits in your workflow at a glance.
Click any row to open the post in the editor. The three-dot menu on each row includes the Edit option and a Delete option to remove the post from the library.
Board view for your posts library
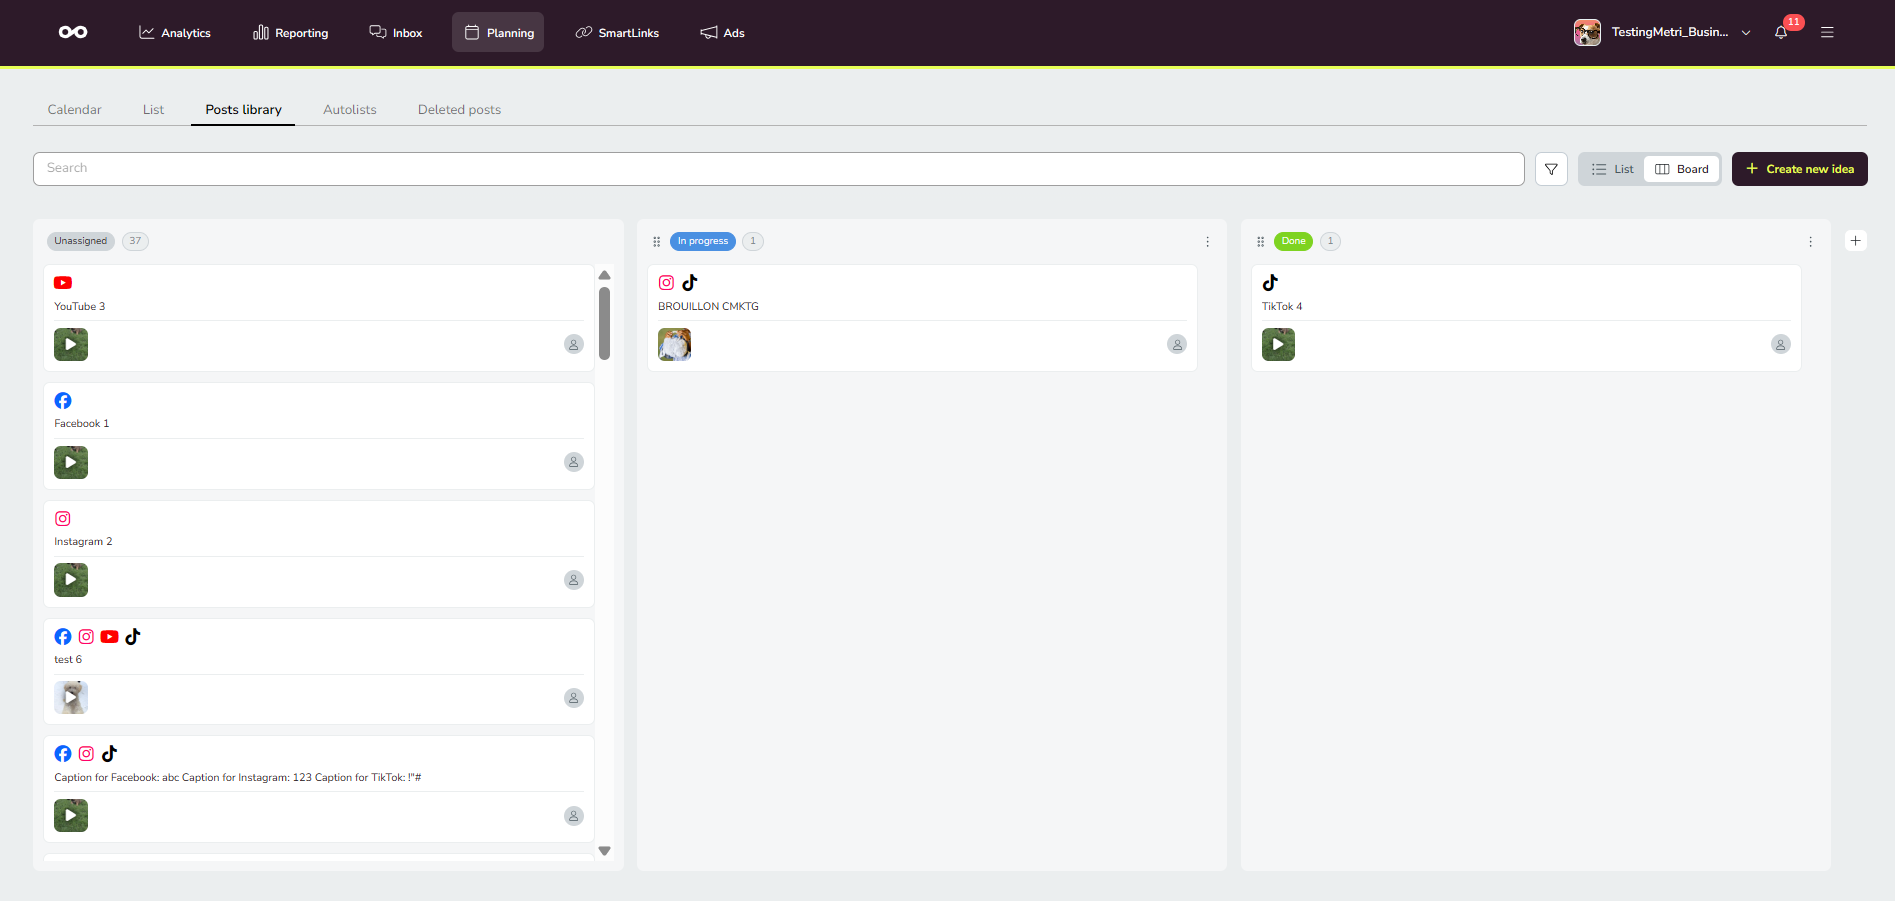
The board view is an alternative to the list view for seeing and moving your saved posts. It is available on all paid plans with access to the library, the view you choose is remembered per user and brand, and it is not available in the mobile app in this version.
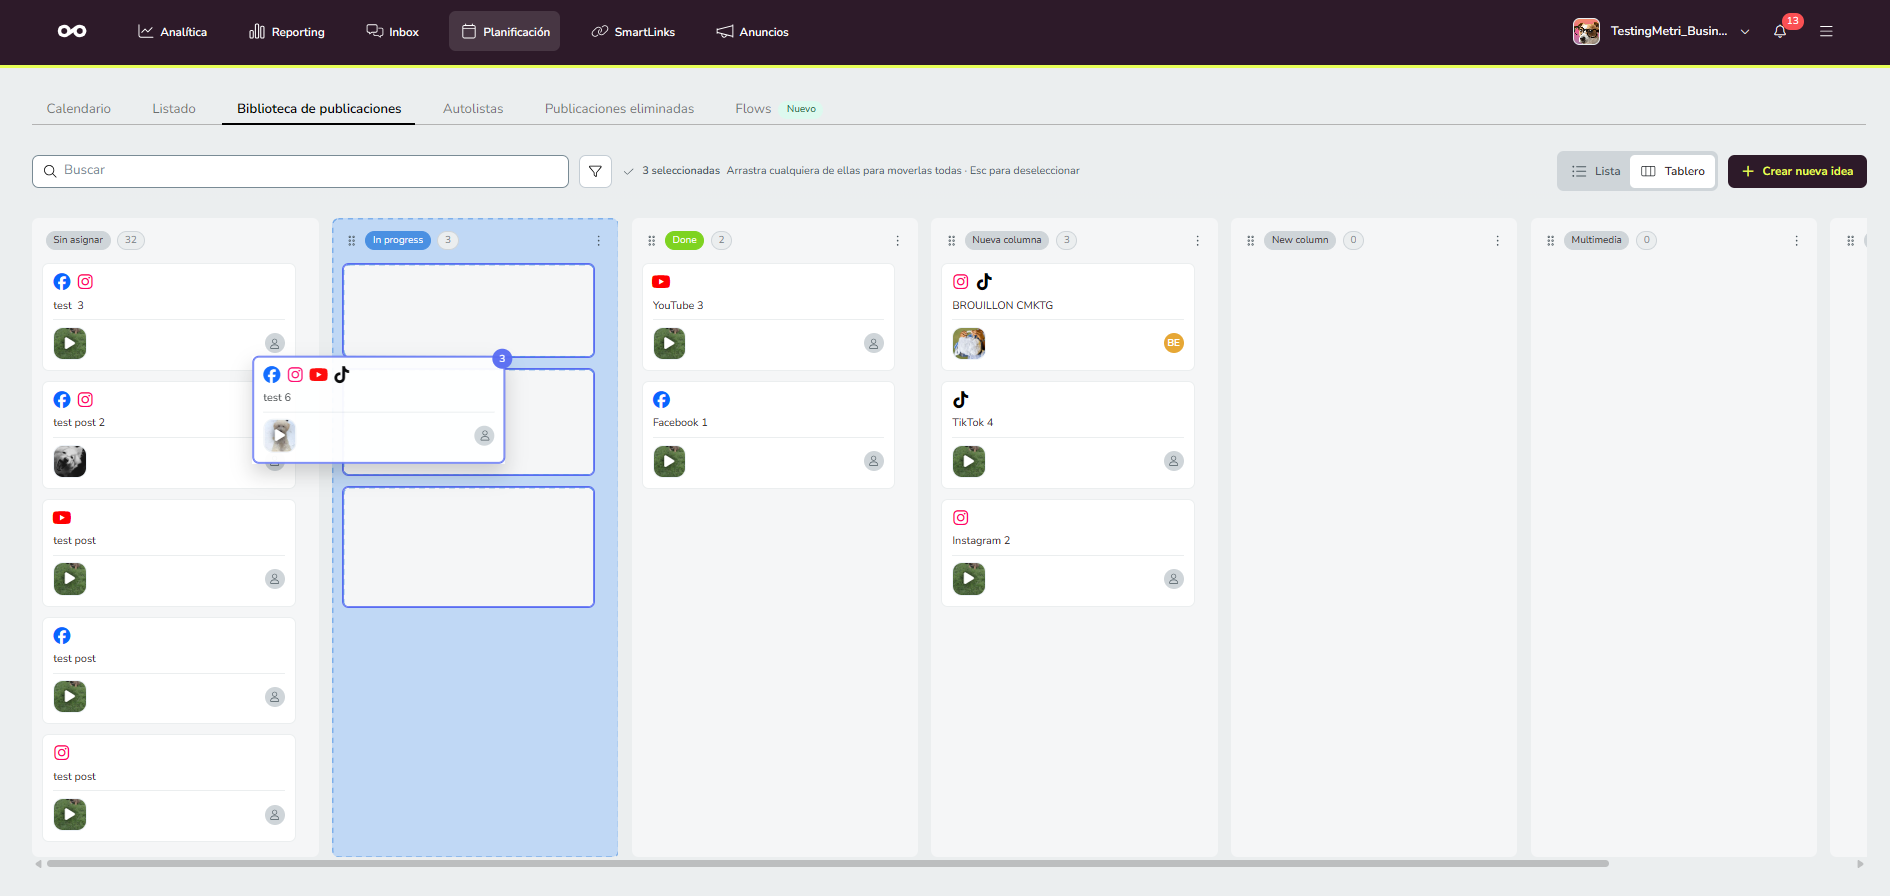
The board shows one column per workflow state of the brand, plus a permanent "Unassigned" column that holds posts not assigned to a state. Each column displays the state name, its colour, and the number of posts it holds. Cards carry the same information as in list view: the media preview, post text, networks, and the assigned member.
You can filter and search the posts in both the board and list views, using the search bar and filters to narrow down what you see.
The board also gives you actions on each column, and a + button to add a new column to the board. Clicking the three-dot menu on a column lets you Rename, Change color, or Delete that column.
Move cards between states
Drag a card from one column to another to change its state. Every change is recorded in the post's activity history and requires the Schedule or Send to review permission.
To move several cards at once, hold Ctrl (Windows) or Cmd (Mac) and click each card to select it, then drag one of the selected cards to another column. Every selected card moves to that state at the same time, and each move is recorded in the activity history of its post.
Custom workflow states
You can create, rename, colour, reorder, and delete the workflow states directly from the board, so the columns match how your team works.
Each brand starts with two default states, In progress and Done, plus the permanent "Unassigned" column. The states are configured per brand and shared by the whole team.
A state can only be deleted when no library post is assigned to it, so the delete action stays blocked until those posts are moved to another column.
Configuring states requires the Schedule or Send to review permission and is available on web only.
Column limits
The board supports up to 30 columns, and it scrolls horizontally once the columns fill the width of your screen.
Filters
Filters narrow down the posts you see, which makes it quick to find only the posts that still need work. Most filters work the same in the board and list views, and one is available only in the list view.
Filters in both views
Assigned: the team member a post is assigned to. The filter includes a search box to find a team member quickly, and it only lists members who have at least one post assigned to them.
Social networks: the networks of the post, and the post type for the networks that have them.
Notes: show posts with no notes, with read notes, or with unread notes. You can select one, several, or all of these options.
Campaign dashboards: the campaign dashboards a post belongs to.
Filters in list view only
Status: the columns (workflow states) you have set up. The board view has no Status filter because each column already represents a state.
FAQs
Why do posts stay in the library after I schedule them?
The library works as a reusable content space, so we don't remove or mark posts automatically when you schedule them. This keeps templates and evergreen content available to use again.
If you'd like to keep track of what you have already used, one option is to create a state with the + button in the board view, for example "Already used" or "Sent to calendar", and move each post there once you schedule it. That way, the pending posts stay in their own columns in the board view, and in the list view you can use the Status filter to show only the pending ones.
Keep in mind that the scheduled post is a copy, so the card in that state is not the post in your calendar. Changes to one don't affect the other.
Why can't I move cards or change columns in the board?
Moving cards between states and configuring states both require the Schedule or Send to review permission. Configuring states is available on web only, and the board view is not available in the mobile app.
What happens to the scheduled post if I edit the library post?
Nothing. When you schedule a post from the library, we create a new post in your calendar, and the two are completely independent. Editing or deleting the library post doesn't change the scheduled one, and the other way around. The notes of the scheduled post record that it was created from the library.
Can I recover a post I deleted from the library?
No. Posts deleted from the library can't be recovered, so check before you delete. Only posts deleted from the planning calendar can be restored, as explained in How to recover deleted posts in Metricool.